From Lawn to Legend: Building Your Own Backyard Pickleball Court
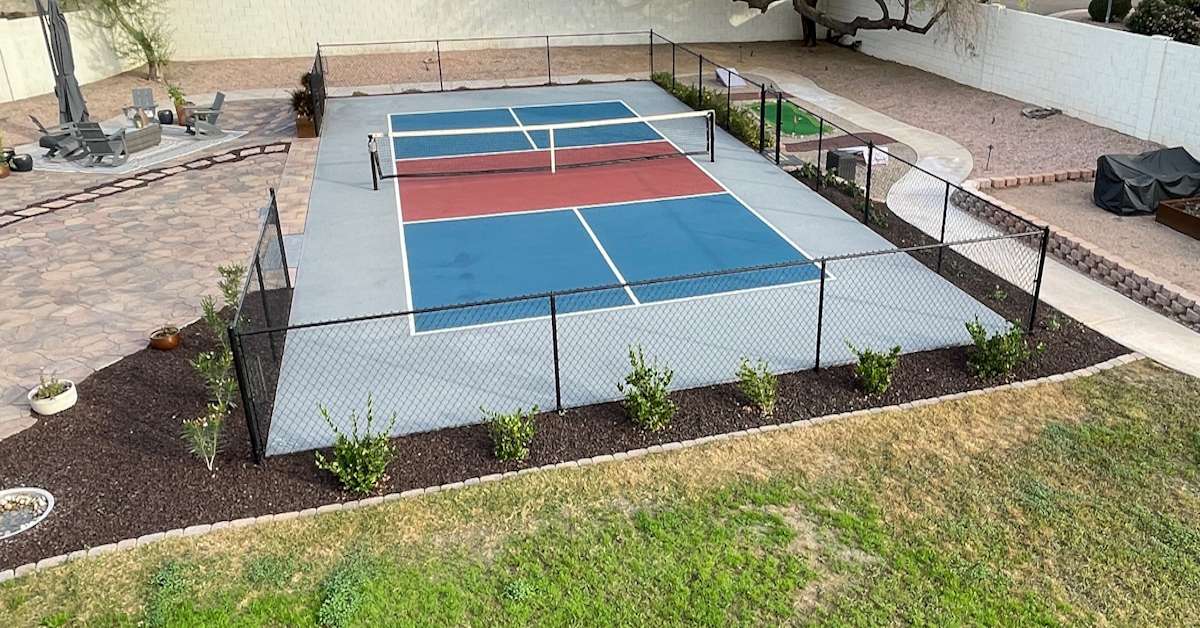
Building Your Own Backyard Pickleball Court
Pickleball is officially taking over, and if you have the backyard space, there is no greater home upgrade than building your own dedicated backyard pickleball court. Imagine skipping the crowded public park lines, turning off the reservation apps, and private club fees, and simply stepping outside into your own private sports oasis.
Transforming a patch of grass into a professional-grade playing surface is a massive project that requires juggling structural engineering, precise layout geometry, and specific surface chemistry. If you are ready to put in the sweat equity, here is your definitive, fully flushed-out blueprint to take your yard from lawn to legend. But first lets look at the pros and cons of a backyard pickleball court.

Step 1: Permits, HOA, and the Perfect Court Footprint
Before you buy a single bag of concrete or hire a contractor, you must clear the legal hurdles. A backyard pickleball court is a massive slab of impervious surface (concrete), which means it warrants specific city and neighborhood rules.
- Zoning and Permits: Visit your local city planning website and check the regulations regarding impervious surface limits (how much of your lot can be covered by concrete/asphalt) and setback requirements (how far a structure must be from your property line). A court built over an easement or too close to a neighbor’s fence can be legally forced to be removed by code enforcement.
- The HOA Factor: If you live in an HOA, submit an architectural request early. Highlight that you will use muted, earth-toned surface colors and low-profile fencing to prevent the build from looking like a commercial park.
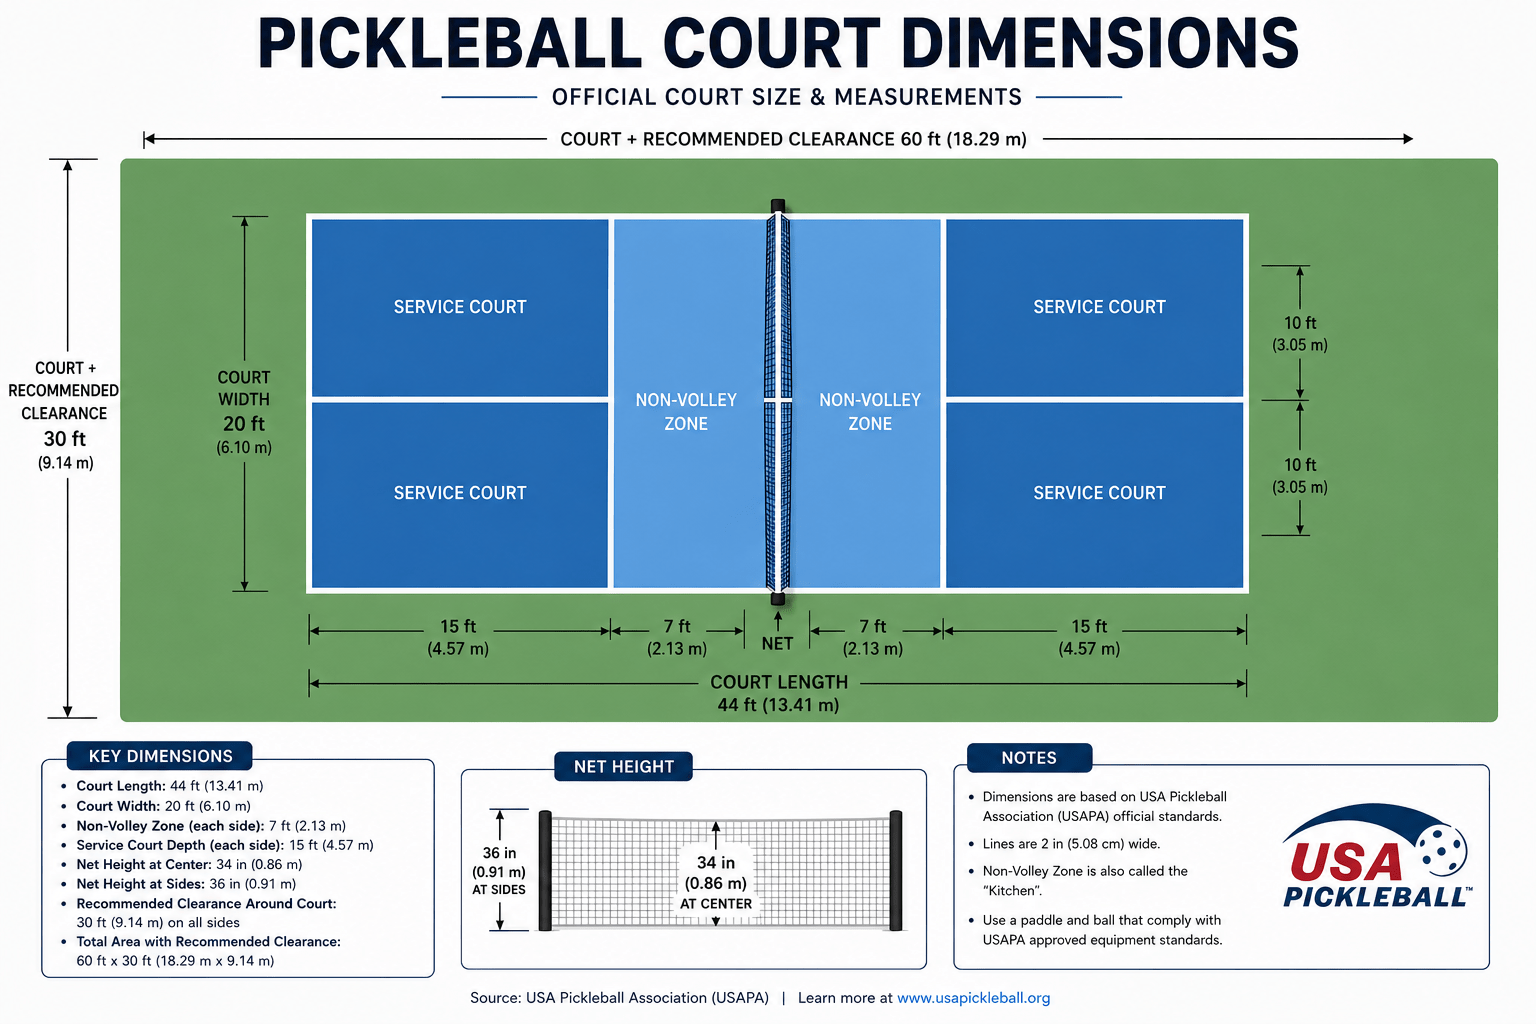
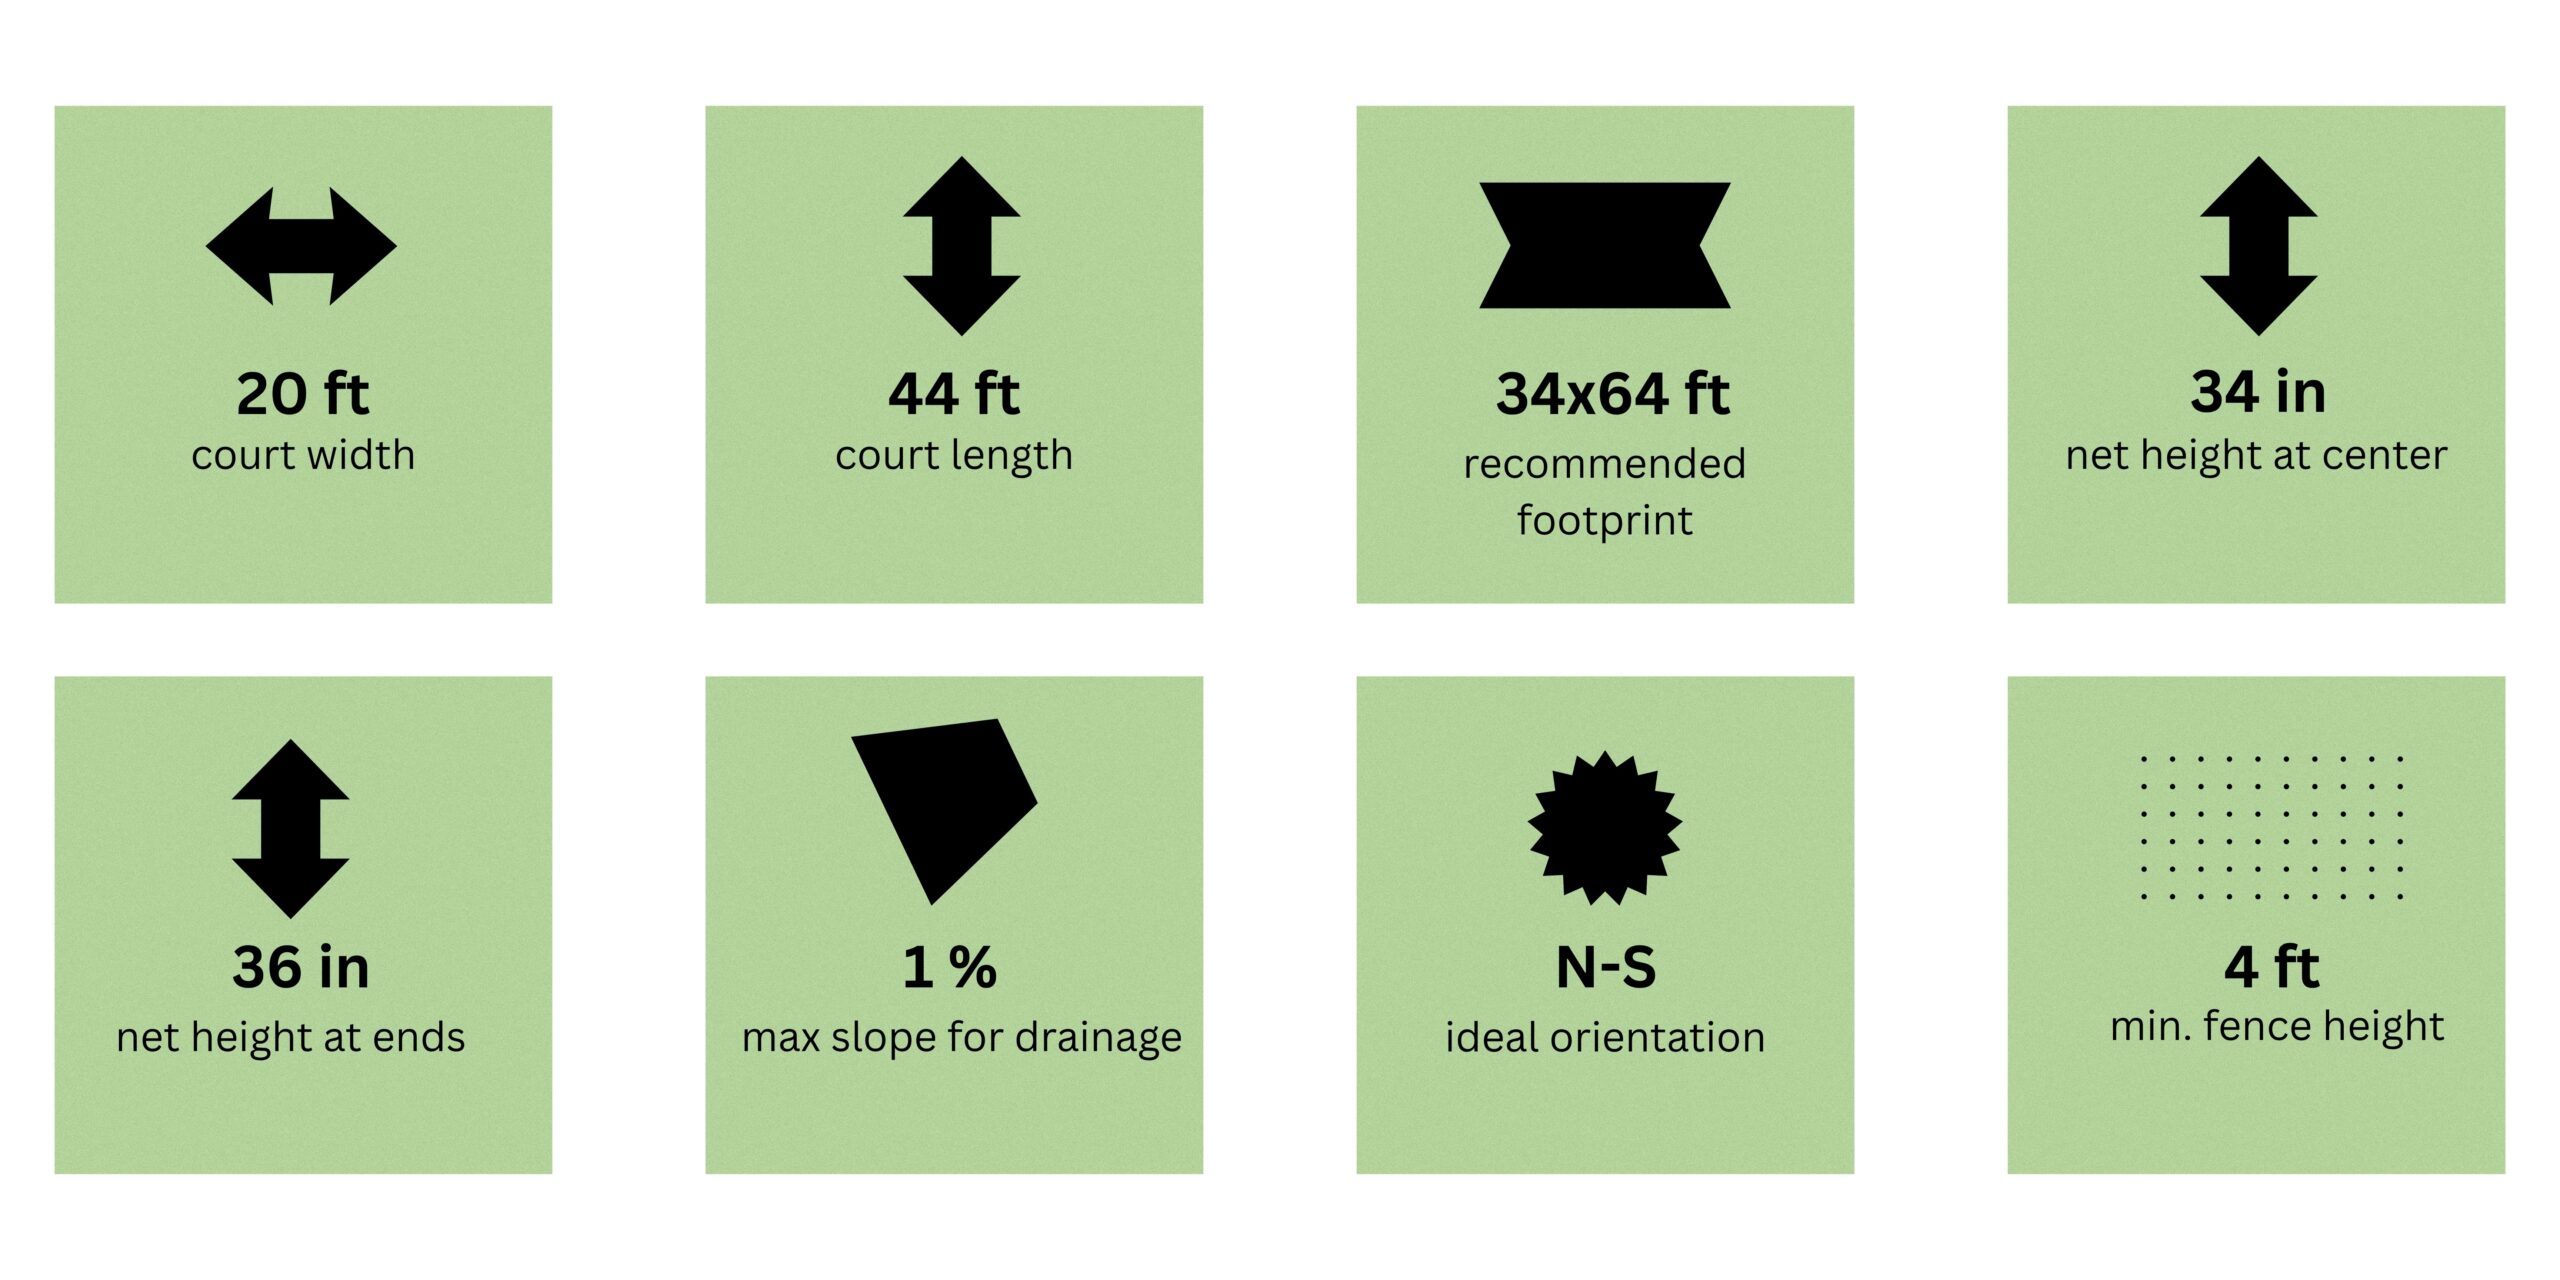
- The Court Geometry: A standard pickleball court is exactly 20 feet wide by 44 feet long. However, you cannot play with fences right on the lines; you will run into them sprinting for a deep lob. The absolute minimum total footprint required for safe play is 30 feet wide by 60 feet long. If you want a tournament-legal feel where you can chase down angled dinks, aim for 34 feet wide by 64 feet long.
- The Golden Rule of Orientation: Always orient your court North-to-South. If you mistakenly align it East-to-West, the rising or setting sun will blind one side completely during peak morning and evening playing hours, rendering the court practically unplayable for half the day.
Step 2: Excavation, Soil Mitigation, and Grading
A court is only as good as the dirt beneath it. If your sub-surface shifts, your beautiful concrete slab will crack, buckle, and ruin your playing surface.
- Clear and Dig: You must excavate all organic matter within your 30×60 footprint. Dig down roughly 6 to 8 inches. Removing the grass, roots, and soft topsoil is vital because decaying organic material creates hollow air pockets under the slab over time.
- Grade for Drainage: A pickleball court must be perfectly flat, but it cannot be perfectly level. It needs a subtle tilt to shed rainwater. Your grading goal is a 1% slope running in one direction (typically across the short 30-foot width). This equates to a drop of roughly 1 inch for every 10 feet of width, allowing water to sheet off cleanly rather than pooling in the middle of the kitchen.
- The Sub-Base: Lay down a 4-inch layer of crushed aggregate stone (such as ¾-inch road base or crushed limestone). Do not use round river rock, as it shifts under weight.
- Compaction: Rent a commercial gas-powered plate compactor from a local tool yard. Run it over the aggregate stone base multiple times, lightly misting it with water, until the stones lock together like a solid highway bed.
Step 3: Pouring the Slab (Concrete vs. Asphalt)
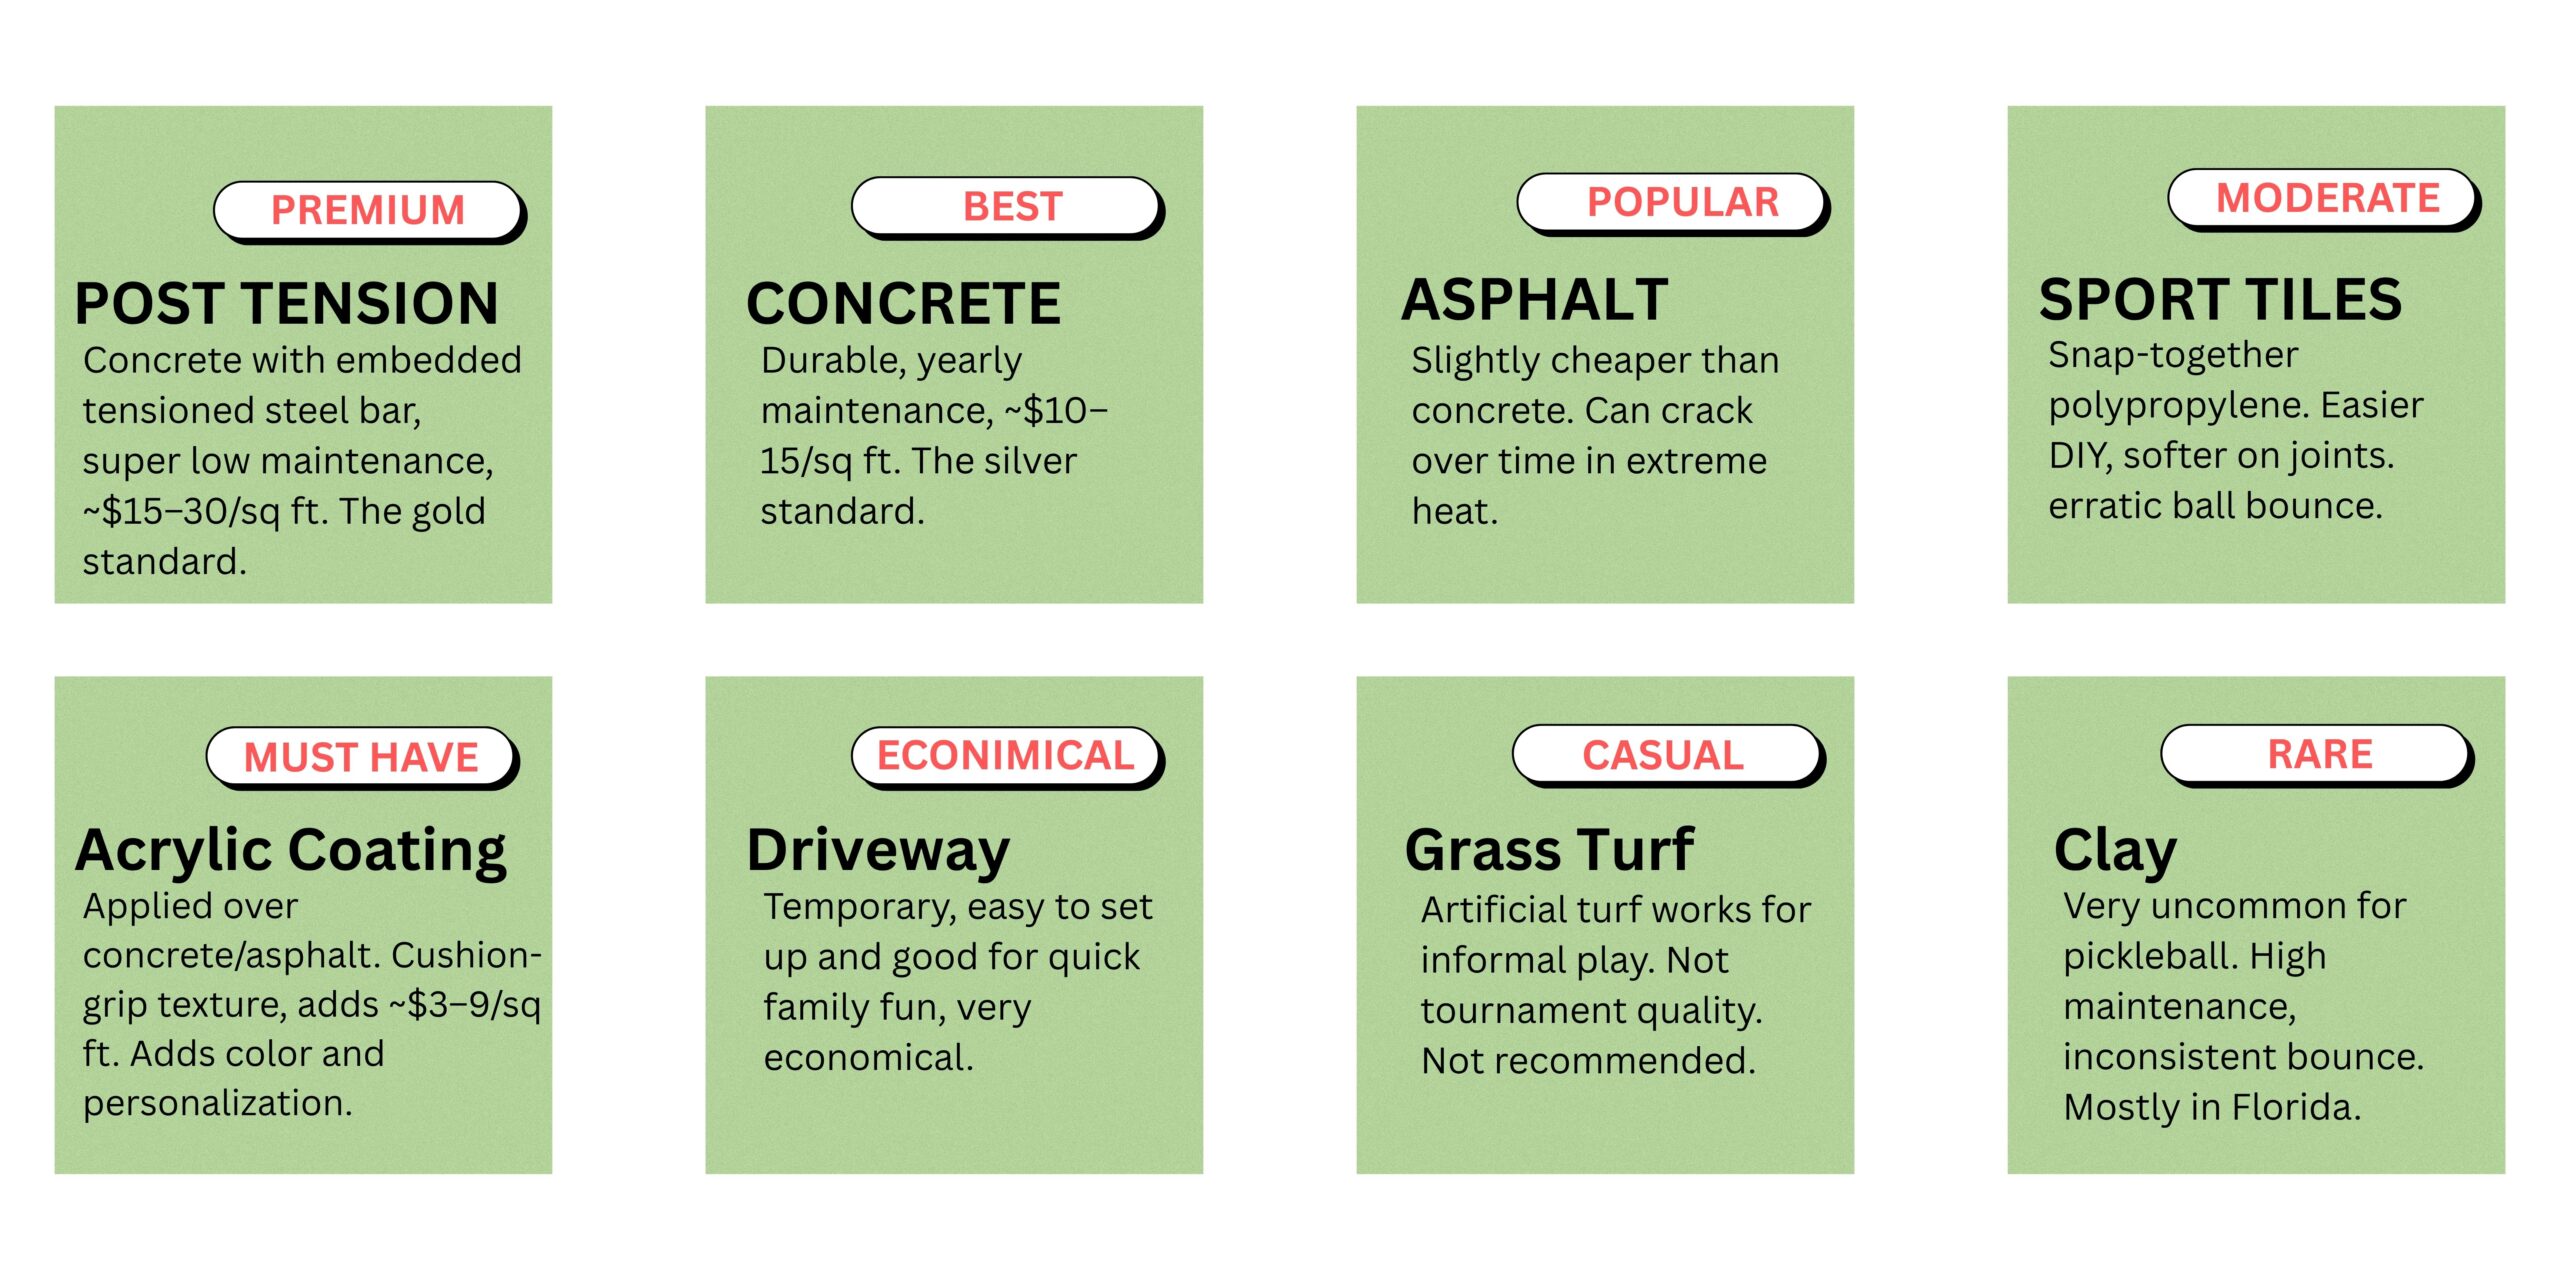
This is the most critical structural decision of the build. While asphalt is slightly cheaper up front and softer on your joints, concrete is the undisputed gold standard for backyard builds because it lasts decades without requiring regular resurfacing or suffering from edge-crinkling.
- The Mix Recipe: Specify a 4-inch thick concrete pad using a 4,000 PSI mix. If you live in a cold climate prone to heavy winter freezes, explicitly ask for an “air-entrained” concrete mix to prevent freeze-thaw surface flaking.
- Rebar Reinforcement: Never rely on cheap wire mesh. Instruct your concrete crew to create a structural grid using #3 or #4 steel rebar spaced 16 inches apart. This steel skeletal framework holds the slab together as a single monolithic unit.
- Post-tension concrete is the ultimate structural upgrade for backyard sports courts, especially in areas with expansive clay soils like the desert southwest.
Unlike standard reinforced concrete—which uses passive steel rebar to hold a slab together after it cracks—post-tensioning is an active engineering system. High-strength steel cables encased in plastic sheathing are laid out in a grid pattern inside the formwork before the concrete is poured. Once the slab cures to a specific strength, a hydraulic jack grips the ends of these cables and pulls them under immense pressure (roughly 33,000 pounds of force per cable) before anchoring them into place.
This intense pulling force compresses the entire concrete slab from all sides, effectively squeezing it together. Because concrete is incredibly strong under compression, this active squeeze virtually eliminates surface cracking, prevents shrinking joints, and guarantees your pickleball court will stay perfectly flat and level for decades, regardless of how much the ground underneath shifts. - The Finish: Tell the concrete finishers you want a medium-broom finish. If the concrete is troweled glass-smooth, the acrylic paint will not bond properly. If it is too rough, it will eat through your paint and shoes. A light-to-medium broom texture provides the perfect “teeth” for the paint to bite into.
- The 28-Day Curing Law: Do not rush this step. Concrete undergoes a chemical curing process and must sit for a full 28 days before you touch it with paint. Attempting to coat it early traps escaping moisture underneath, which will blister and peel your expensive court paint within months.
Step 4: Acrylic Surfacing and Precision Lines
Do not use standard outdoor house paint, garage epoxy, or deck stain. These coatings turn into a dangerously slippery sheet of ice the moment a drop of sweat or morning dew hits them.
- The System: Use a dedicated, 100% acrylic sports surfacing system (brands like SportMaster or Laykold). This process involves applying an acrylic resurfacer base coat to seal the raw concrete pores, followed by two color coats mixed with fine-mesh silica sand. The sand is what provides the essential slip-resistance, consistent ball bounce, and tennis-shoe grip required for quick kitchen line pivots.
- Application: Apply the paint using a flexible rubber commercial floor squeegee (50 to 60 durometer). Pour the paint in a long line down the court and pull it smoothly to ensure an even, non-streaky thickness.
- The Kitchen Distinction: To give your court a pro look, use a dual-color scheme. Paint your outer boundary zones a neutral dark green or slate gray, and paint your inner court and “The Kitchen” (the non-volley zone) a contrasting light blue or vibrant green.
- Snapping the Lines: A standard pickleball line is exactly 2 inches wide. Use a high-quality chalk line to map out your boundaries perfectly. Tape the edges using premium masking tape (like FrogTape) and seal the inner tape edge with a thin wipe of clear acrylic sealer before painting the white lines. This stops the white paint from bleeding underneath, giving you razor-sharp, professional edges.
Step 5: Net Systems and Enclosed Fencing
The final phase transforms your Pickleball slab into an functional Pickleball stadium court.
- Permanent Net Sleeves: For a premium setup, do not use temporary or cheap nets. Buy a heavy-duty, commercial-grade ground sleeve net system. Crucial tip: You must dig two 3-foot-deep holes and set the steel ground sleeves into the dirt before the concrete slab is poured, ensuring they are perfectly spaced exactly 22 feet apart (centered on the 20-foot wide court lines).
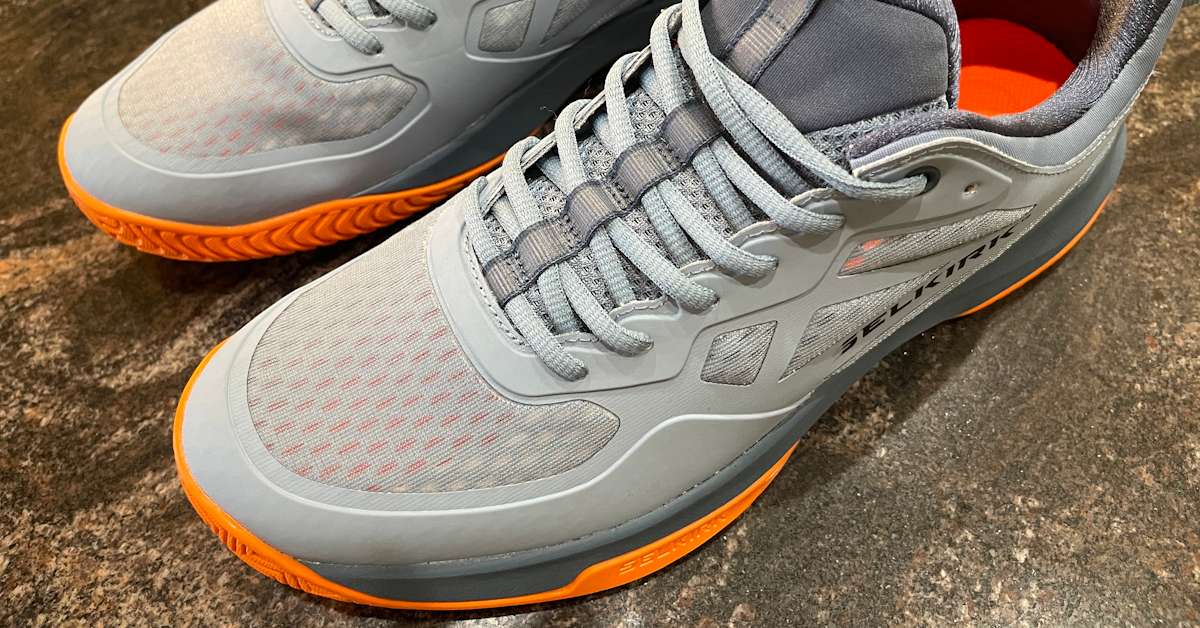
- Some companies like Selkirk, make roll away nets, they are high quality but are more expensive then in ground sleeve systems. But these are what the pros use.
- The Regulation Height Rule: A regulation pickleball net must stand exactly 36 inches high at the far left and right sidelines, but slope down to exactly 34 inches high at the dead center. Use a center strap anchored to a small flush-mount hook in the concrete to lock in that center 34-inch height.
- Acoustic/Defensive Fencing: Pickleball paddles make a distinct “pop” sound that can irritate close neighbors. If space is tight, build a 10-foot-high chain-link or wooden boundary fence on the sides facing neighbors, and line the interior with acoustic sound-dampening windscreens (like Acoustifence) to muffle the noise and keep rogue balls from bouncing into the bushes. Most people put a 4 foot high chain link fence around their court. Believe me this is probably the best investment as you don’t want to be wasting time chasing balls.
Making It Real: DIY vs. Hiring the Pros
Building a backyard pickleball court is a massive physical investment, and it is crucial to understand the true costs. While handling the labor yourself saves money on manual work, renting specialized commercial machinery and buying raw materials still requires a large budget.
Depending on your time, budget, and construction experience, you have two distinct paths to bring this project to life:
Path A: The DIY Hustle
If you choose to manage the build yourself—subcontracting out only the heavy concrete pour while handling the excavation, aggregate base leveling, acrylic painting, and line striping on your own—you can expect a total price range of $15,000 to $28,000. The bulk of this budget will go directly toward raw concrete delivery, rebar, commercial equipment rentals (like gas plate compactors and skid-steers), and premium sports surfacing kits.
Path B: Hiring a Turnkey Contractor
If you prefer to bypass the intense physical labor and heavy machinery, you can hire a dedicated sports court contractor to handle the entire project from start to finish. They will manage everything: soil testing, city permits, engineering, post-tension concrete installation, laser-leveled surfacing, and professional fencing. Hiring a turnkey professional crew typically ranges from $25,000 to $55,000+, depending entirely on your backyard’s existing slope, accessibility for heavy concrete trucks, and the high-end accessories you choose (like commercial LED lighting or acoustic fencing).
For my personal court I hired a contractor. See my entire build process here.

Your Cheat Sheet to Legend Status
No matter which path you choose, just remember the golden rules of backyard Pickleball is to ensure your court is a total backyard playing paradise:
- Don’t blind your friends: Line it up North-to-South so the morning and evening sun stays out of everyone’s eyes.
- Give yourself room to run: A standard court is 20×44 feet, but you need a total 30×60 foot footprint so you don’t crash into a fence while chasing down a deep lob.
- Concrete is king: Spend the money on a solid foundation so your court doesn’t turn into a cracked, wavy mess in a couple of years.
- Skip the house paint: Use real acrylic court paint with built-in sand so you don’t slip, slide, and wipe out the first time a drop of sweat hits the surface.
Walking out your back door, paddle in hand, onto your own private, custom-colored court is an incredible feeling. Take your time, plan it out, and get ready to trade your boring old lawn for neighborhood legend status. See you in the kitchen!