How We Built the Ultimate Home Pickleball Court (Specs, Fencing & Landscaping)
From Lawn to Launch: Inside Our Ultimate Backyard Pickleball Court Build
The secret is finally out. After weeks of heavy machinery, calculated measuring, and checking weather apps like our lives depended on it, our backyard has officially evolved. We traded a patch of high-maintenance grass for a pristine, tournament-grade pickleball paradise—and our morning routines will never be the same.
Going from a dusty excavation site to a vibrant, two-tone playing surface has been an incredible journey. Whether you are dreaming of building your own home pad or you are just waiting for an invite to the inaugural barbecue, here is an exclusive look behind the scenes at how we built the ultimate home court.
The Blueprint: Breaking Down the Specs
To make sure this court plays like a professional venue, we optimized our layout configuration for safety, durability, and maximum playability:
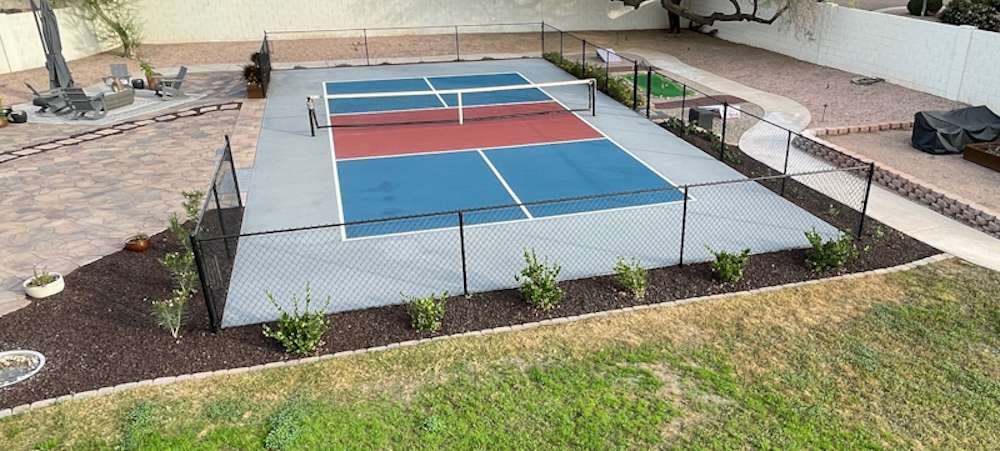
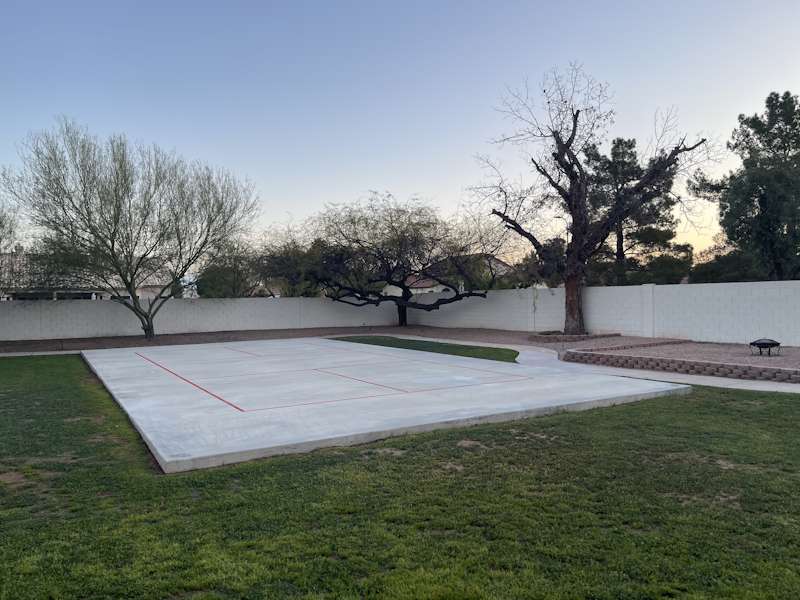
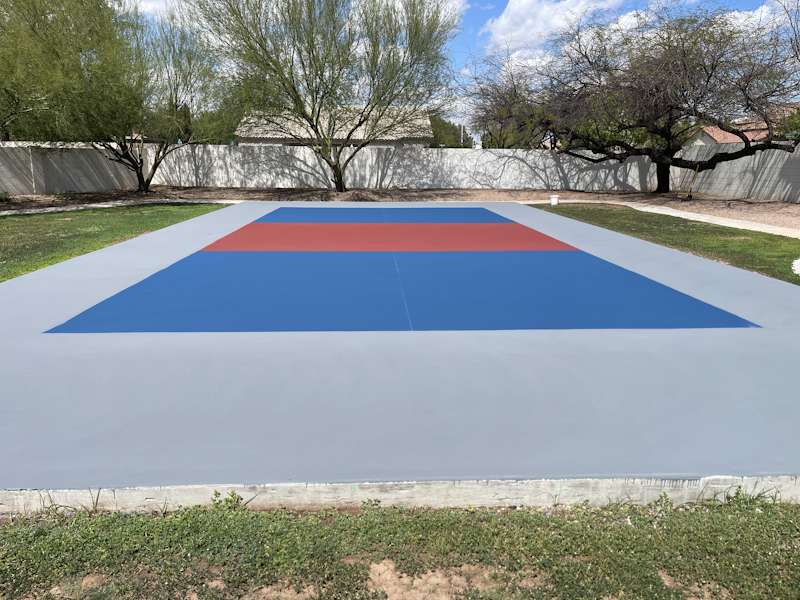
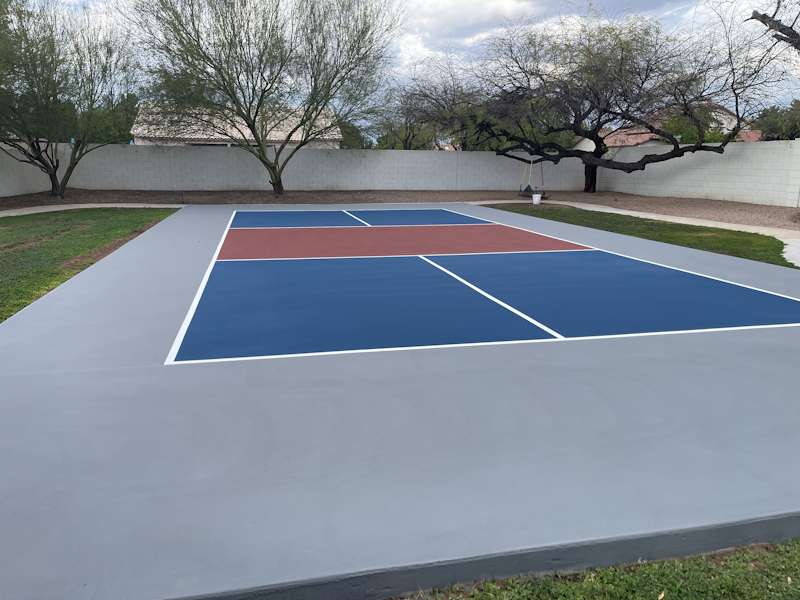
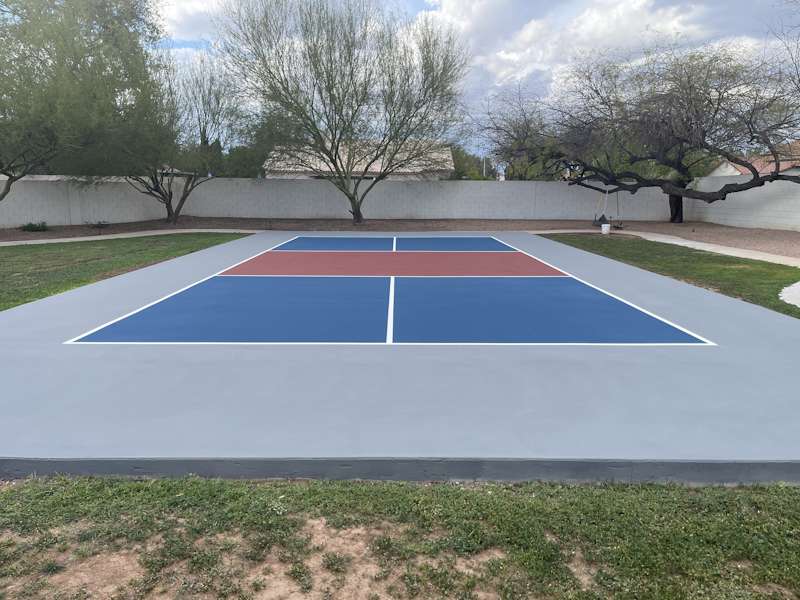
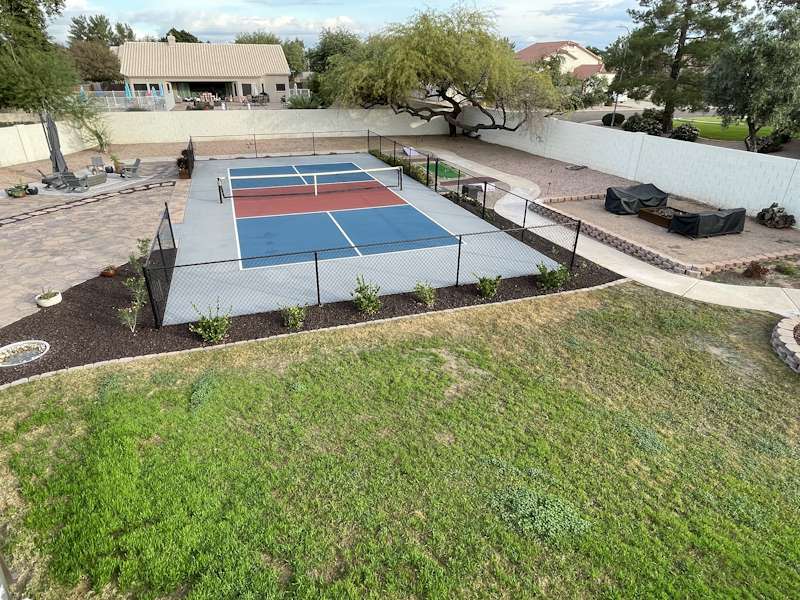
The Footprint (30’ x 60’): While a standard playing grid is 20’ x 44’, our total pad size gives us a comfortable 8 feet of overrun space behind the baselines and 5 feet on the sidelines. It is the ideal, compact footprint for a backyard build that still allows for intense, athletic rallies.
The Perimeter Fencing: We installed a heavy-duty, 4-foot black vinyl-coated chain-link fence around the perimeter. It blends beautifully into the backyard landscaping, absorbs the impact of rogue balls silently, and—most importantly—means we spend our time playing rather than hunting for balls in the bushes.
The Surface Finish: We applied a multi-layered, textured acrylic coating. It provides the perfect cushion to save our knees during marathon three-hour sessions and has just enough grit to give our spin serves some serious bite.
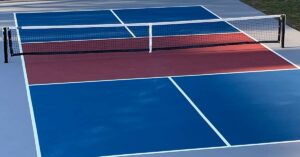
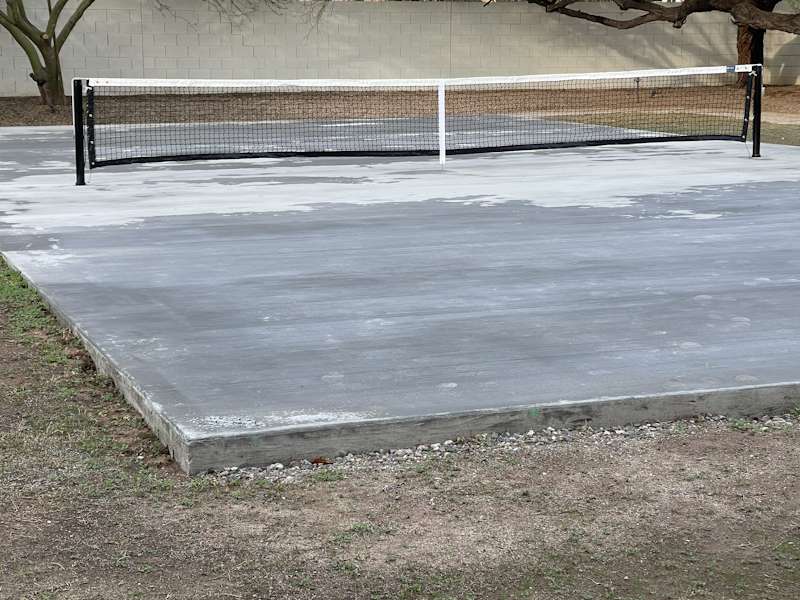
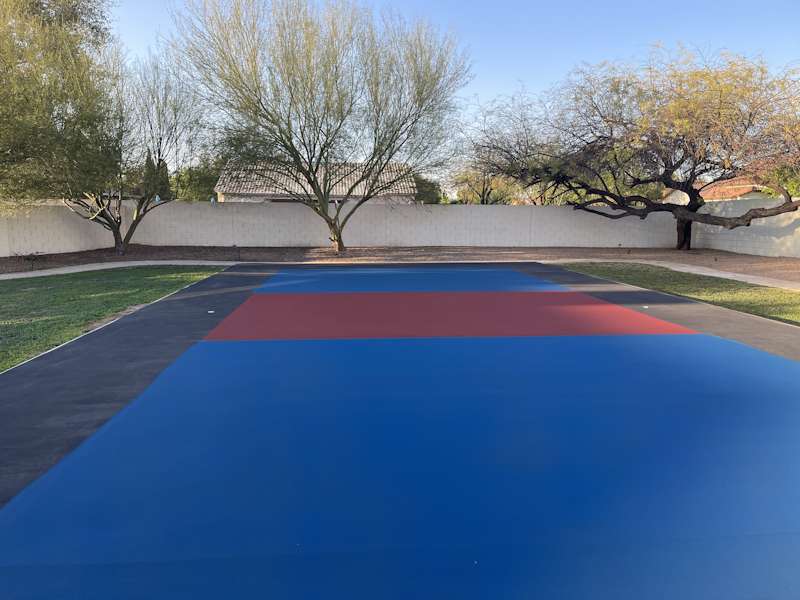
Pro-Level Contrast: We chose a stunning, two-tone color scheme. The inner court pops, while “The Kitchen” and out-of-bounds areas feature a sharp accent color for mistake-free line calls.
The Transformation: Dirt, Dinks, and Dream Building

Every great court starts with a rock-solid foundation. For us, that meant shifting tons of dirt, laying down a perfectly leveled concrete pad, and letting it cure under the sun. We documented most every single milestone along the way.
There is nothing quite like the feeling of stepping onto a crisp, unblemished surface for the first time. The very first rally we played ended in an absolute battle at the kitchen line—proving all the sweat equity was completely worth it.
The Concrete Foundation & Curing Process
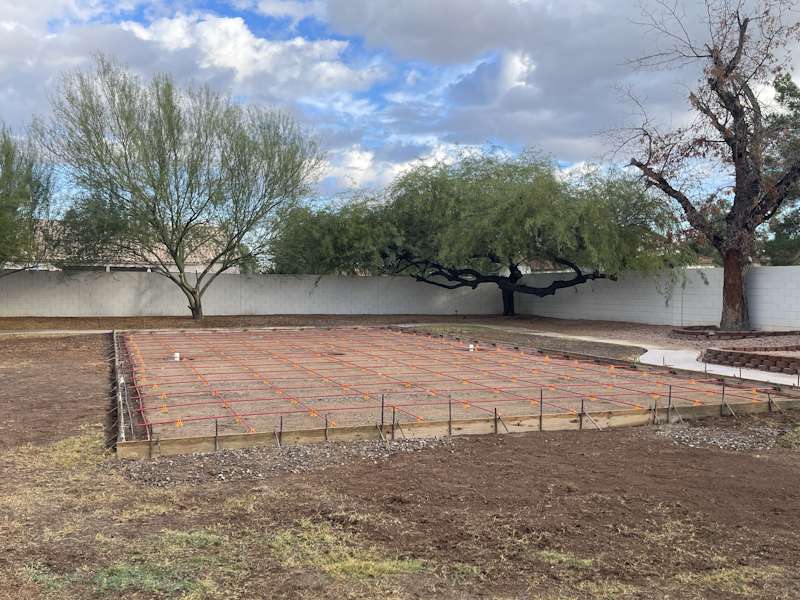
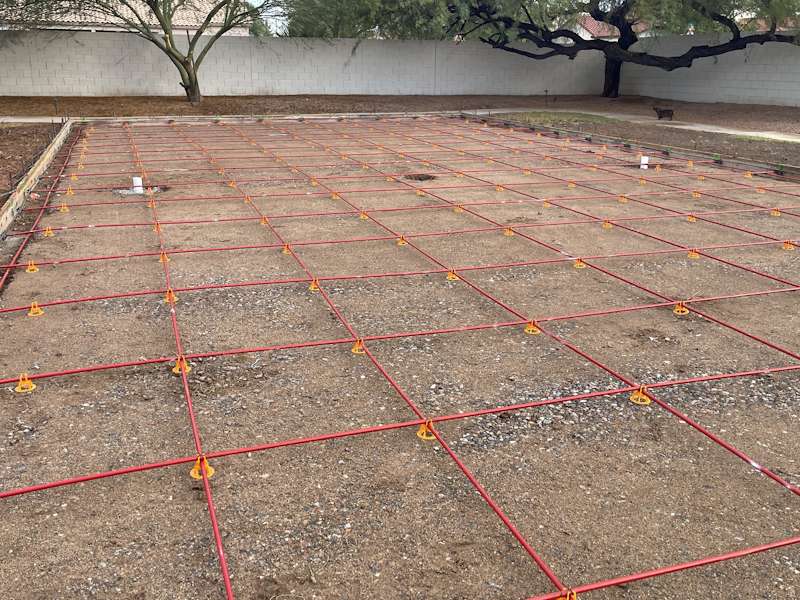
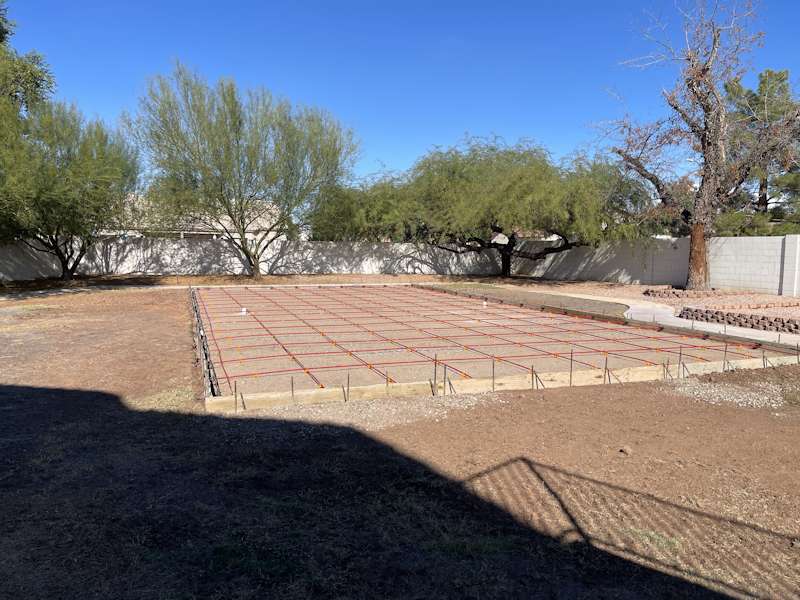
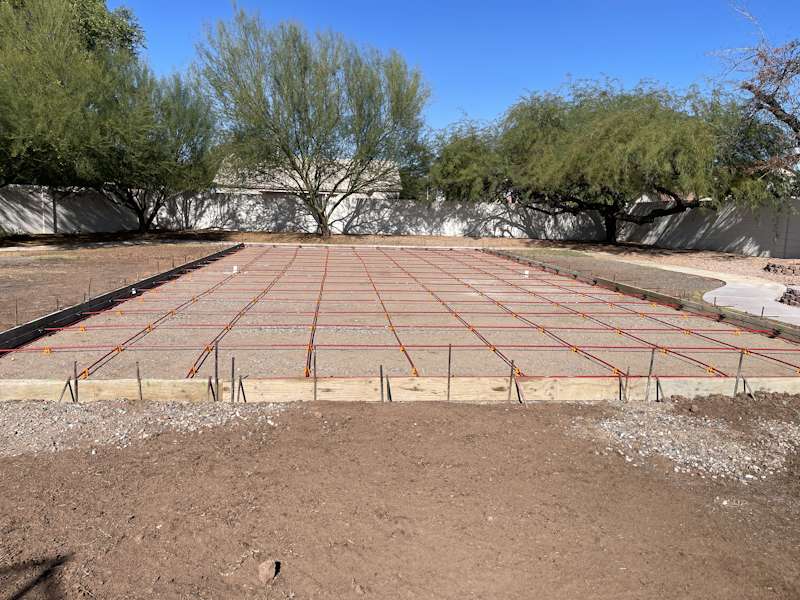

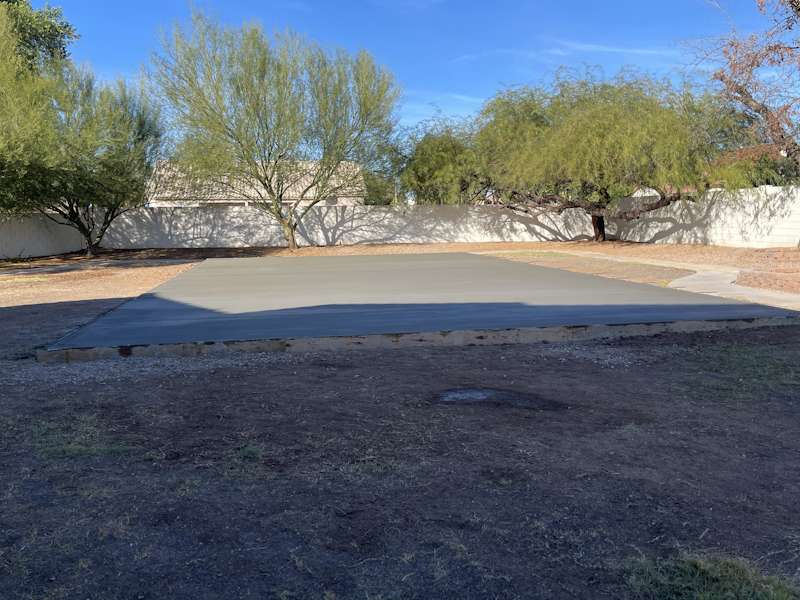

Before we could even think about dinks or deep baseline drives, we had to focus on the most critical phase of the entire build: the concrete foundation. To prevent cracking, settling, or uneven bouncing, we excavated the yard and poured a high-strength, post-tensioned concrete slab.
When laying down this foundation, we had to choose between a traditional concrete slab or a premium post-tensioned system. Ultimately, we went with post-tensioning because it is the absolute gold standard for high-performance sports courts. Unlike a standard slab that relies purely on its weight, a post-tension slab is reinforced with heavy-duty steel cables running through the concrete. Once the pour cures slightly, these cables are tensioned to thousands of pounds of pressure, compressing the slab from the inside out. This extreme compression makes the court virtually immune to the shifting soil, cracking, and surface settling that usually plagues standard backyard concrete over time. It cost a bit more upfront, but it guarantees our court will stay perfectly flat and crack-free for decades to come.
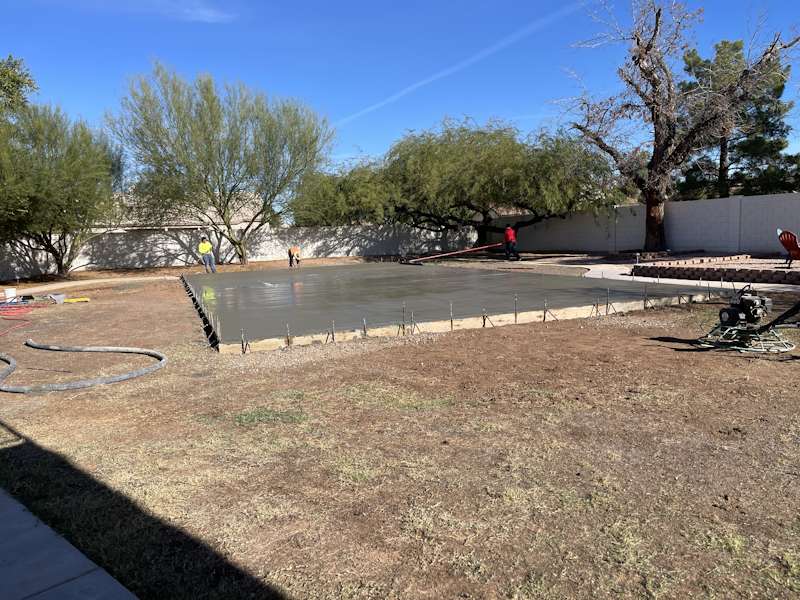
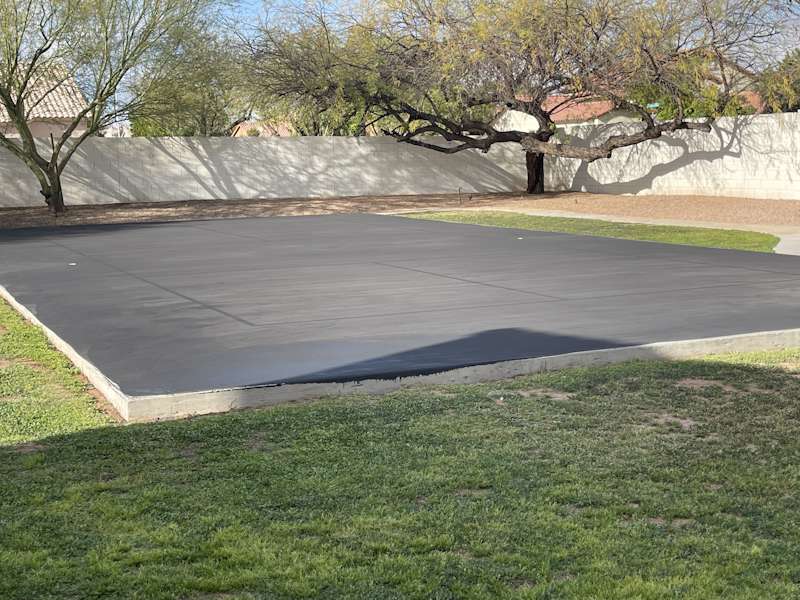
Once the concrete was poured and tensioned, patience became our biggest challenge. Concrete requires a strict 28-day curing window before any court surfacing can be applied. Skipping or rushing this step allows trapped moisture to ruin the paint later on. We spent those four weeks watering the slab daily to ensure it cured evenly, creating a perfectly flat, rock-solid base ready for tournament-grade play.
Overcoming the Hurdles: The Hiccups Along the Way
No major backyard pickleball court build goes perfectly according to plan, and our Gilbert, Arizona pickleball paradise was no exception. While we expected our desert climate to cooperate, we hit a series of bizarre, unforeseen speed bumps that tested our patience long before we could ever hit our first ball.
Our first major hurdle was the weather. Right as we scheduled our excavation, an unseasonal, relentless week of heavy rain rolled through the valley, turning our backyard into a giant mud pit. Because heavy equipment cannot safely navigate or pour on oversaturated desert soil without risking major future shifting, we had to halt operations just to let the ground dry out.
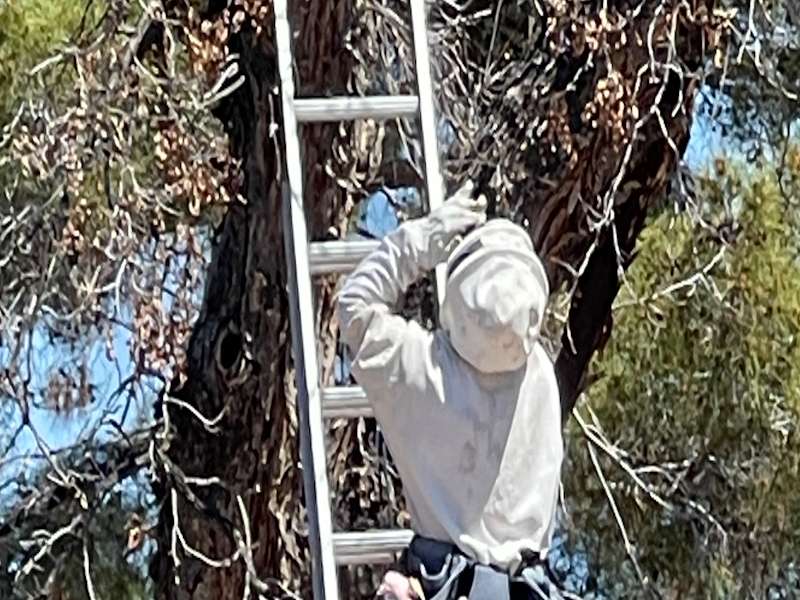
Then came a wild logistical surprise: a massive, active beehive hidden away in a tree right on the edge of the construction zone. For the safety of the crew and the bees, we had to pause everything and bring in a professional live-removal specialist to safely relocate the hive before any digging could continue.
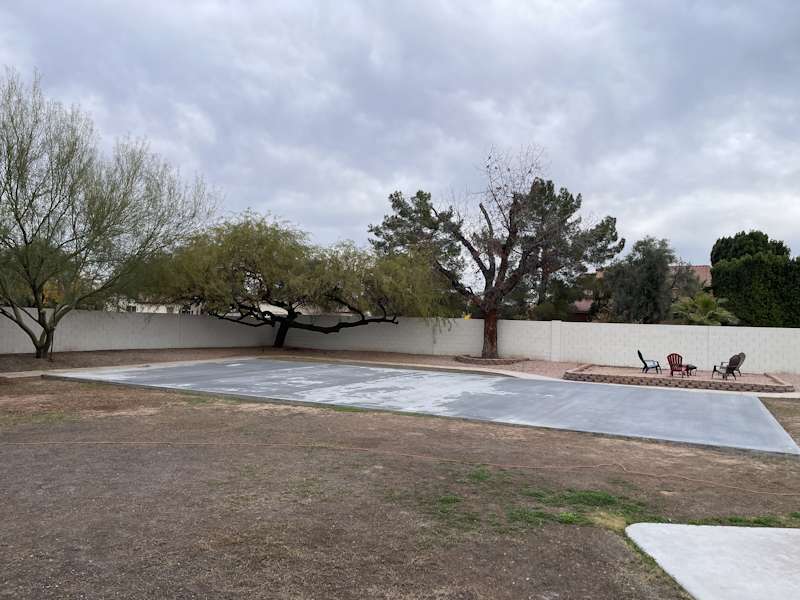
But the biggest test of our patience? The concrete slab itself. For an entirely unknown, mysterious reason, our post-tension slab took months—not weeks—to fully cure out. Whether it was a unique chemical mix quirk or hidden sub-surface moisture levels, the slab simply refused to dry to the strict standards required for the acrylic coating. Rushing it would have meant bubbling and ruined paint, so we had no choice but to wait it out.
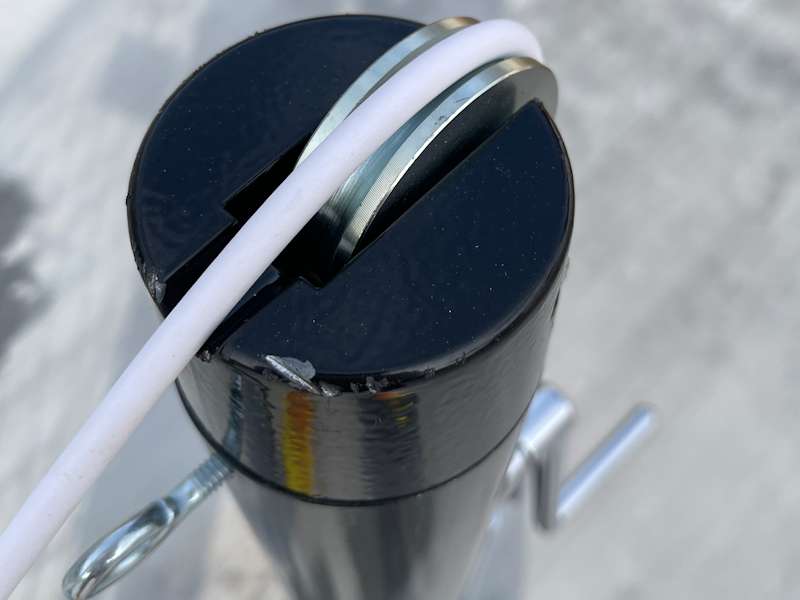
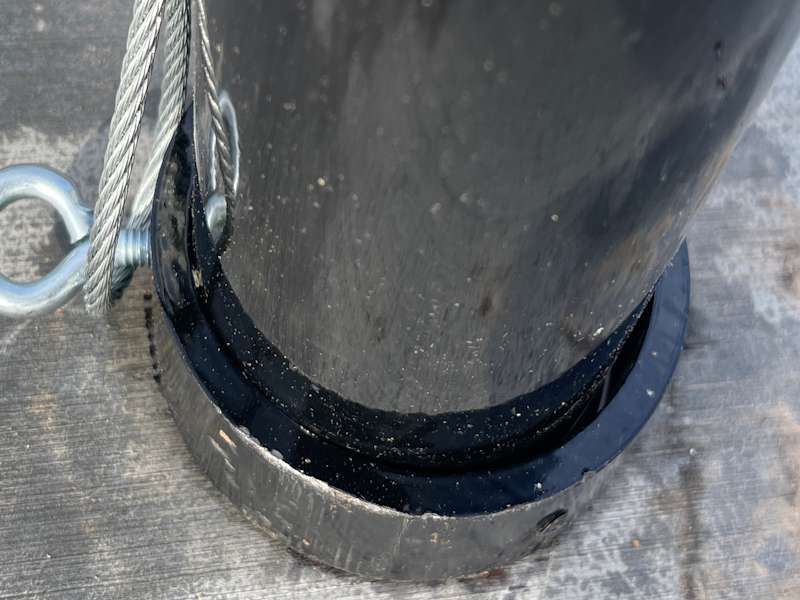
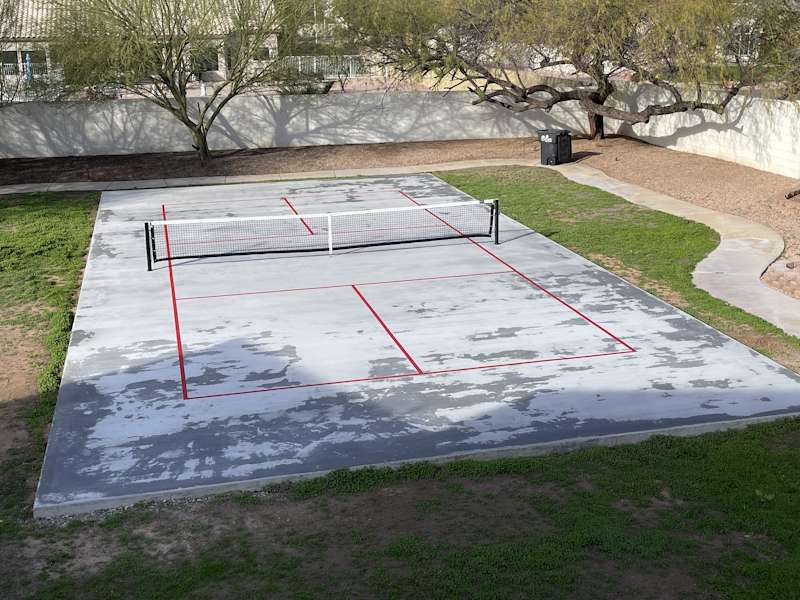
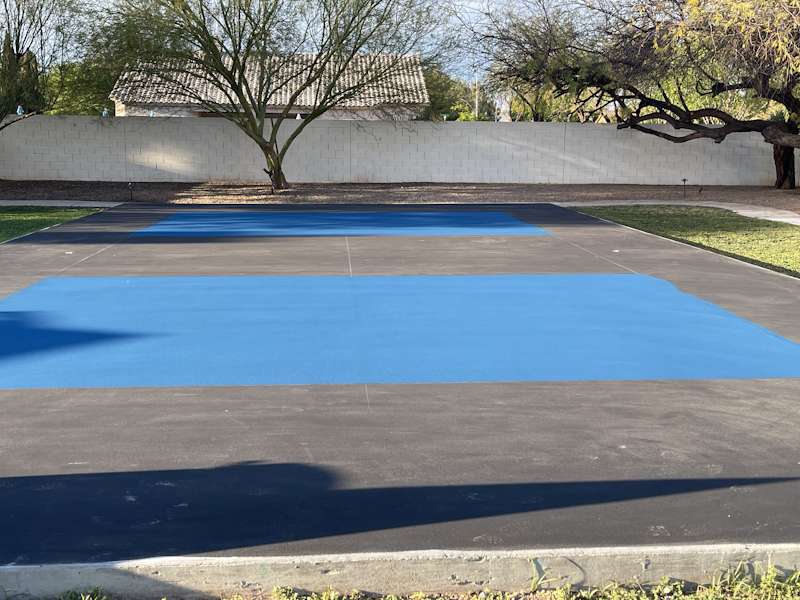
The concrete took so long to cure that we couldn’t take the waiting anymore. Driven by pure pickleball withdrawal, we decided to install the permanent in-ground net post system and paint temporary lines directly onto the raw slab so we could at least play. It wasn’t pretty, but it kept our dink games sharp during those long months of waiting! Facing those hurdles head-on took time, but it ensured our permanent court was built to last.
Paint Specs, Grid Lines, and Acrylic Details

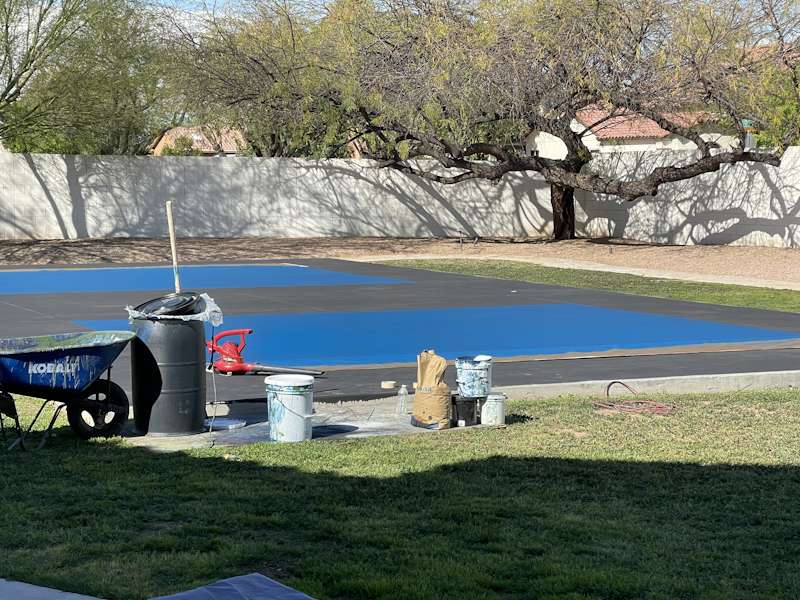
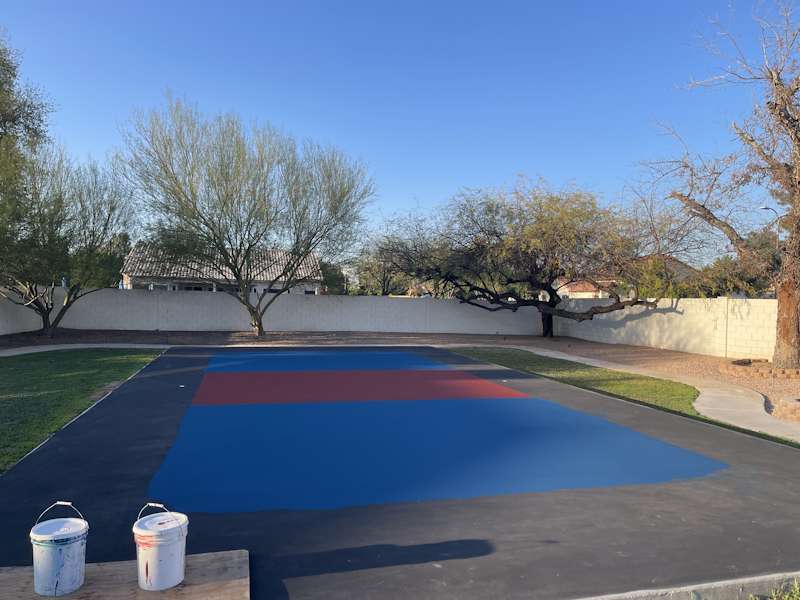
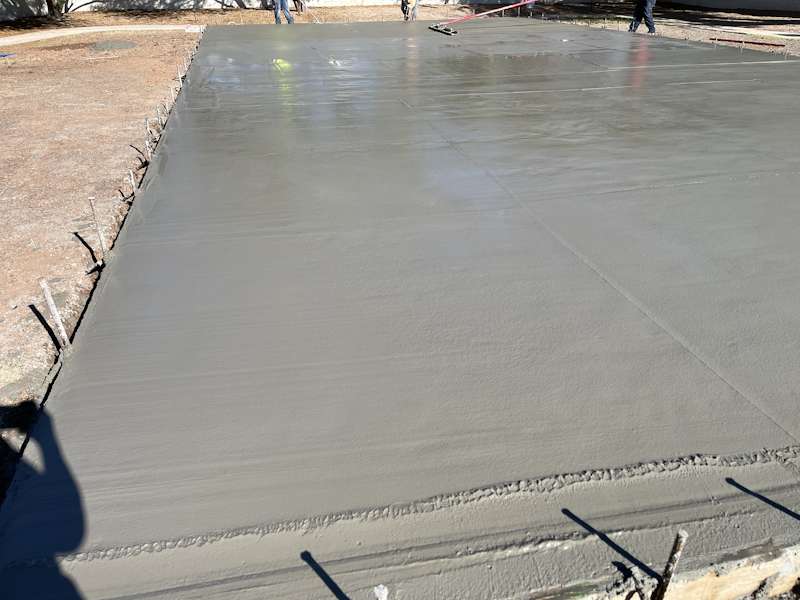
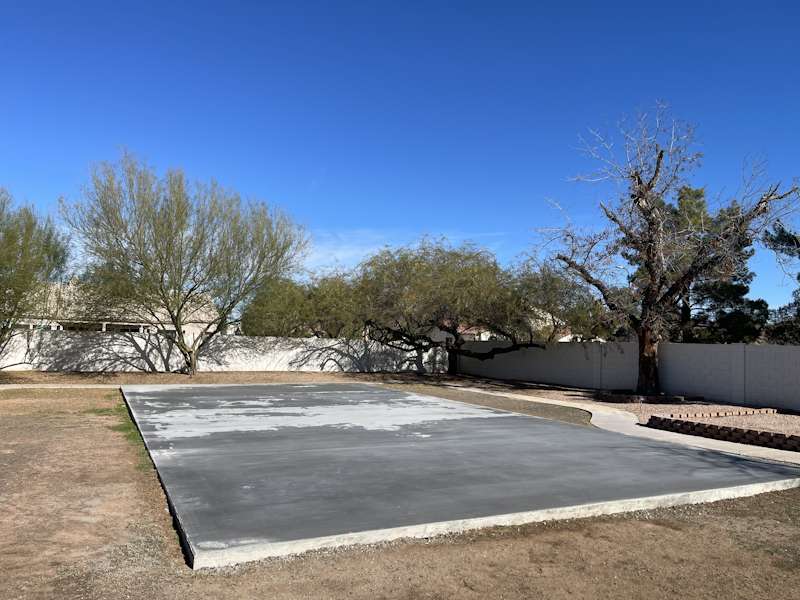
Once the curing window closed, the real magic happened. We didn’t just use standard outdoor paint; we applied a multi-layer, textured acrylic court surfacing system on our backyard pickleball court build . This system is infused with ultra-fine silica sand, which gives the ball its signature true bounce and provides enough grip to prevent slipping during intense lateral movements.
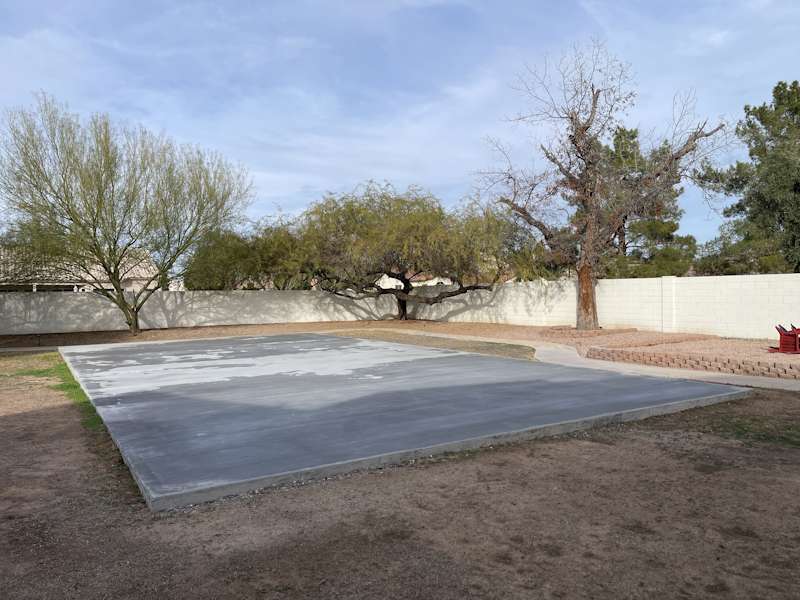
For the layout, we mapped out a standard 20’ x 44’ playing grid, framed by a total 30’ x 60’ concrete pad. This leaves a comfortable 5 feet of overrun space on the sidelines and 8 feet at the baselines. We chose a striking two-tone color scheme: a vibrant Navy Blue for the main playing arena, contrasted with a sharp Sage Green for “The Kitchen” and out-of-bounds areas. This high-contrast pairing makes split-second line calls incredibly clear.
Smart Boundary Design: Why We Chose a 4-Foot Fence
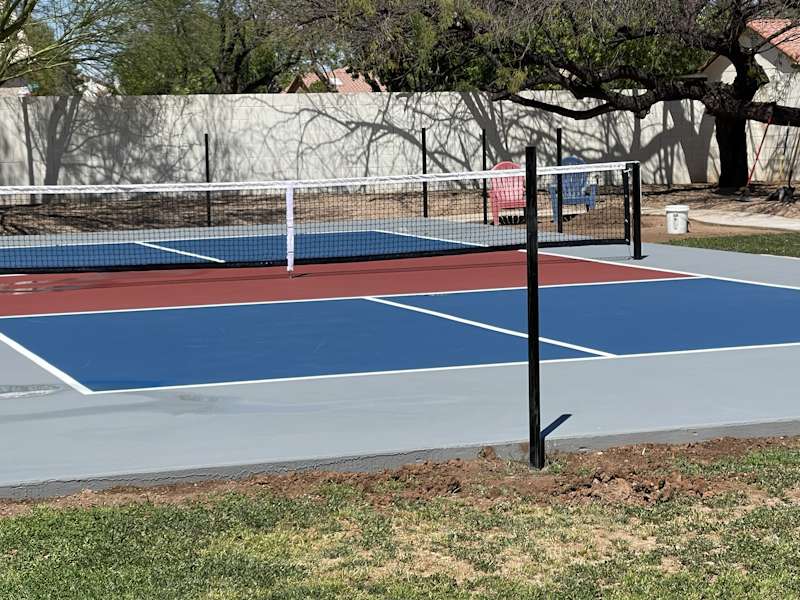
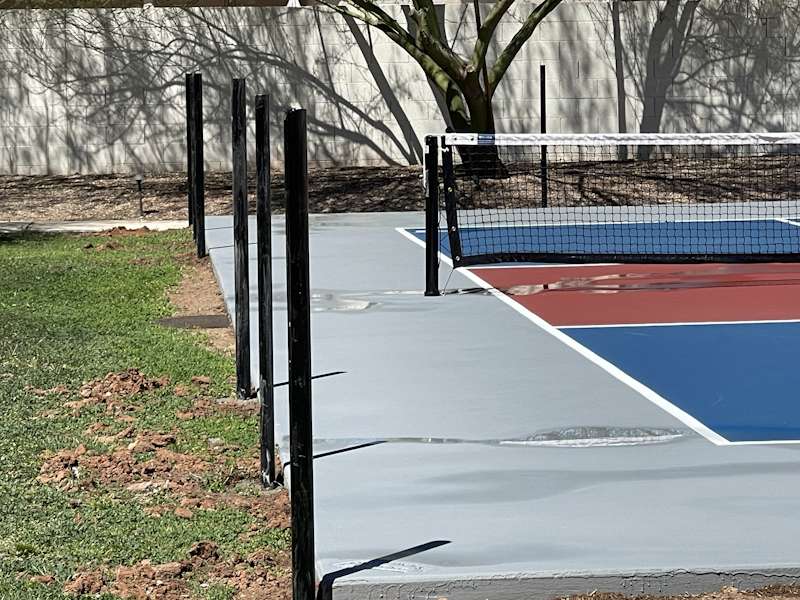
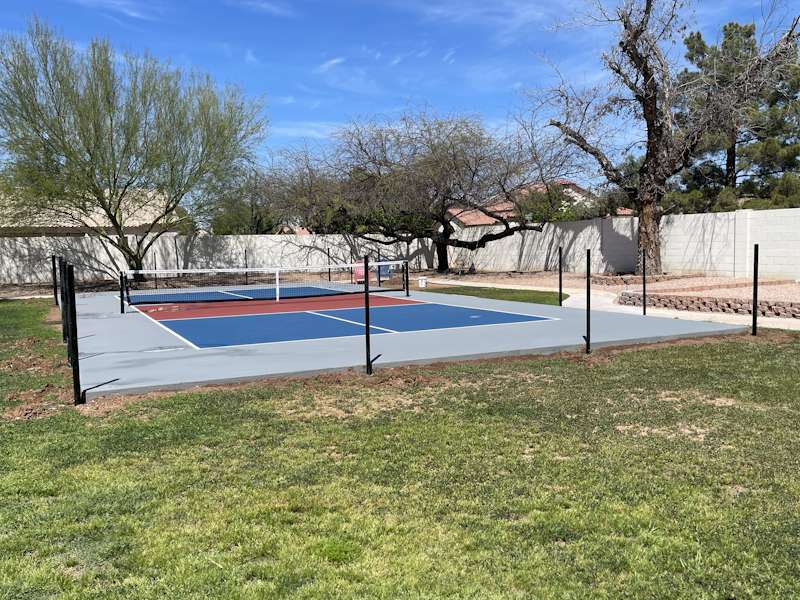
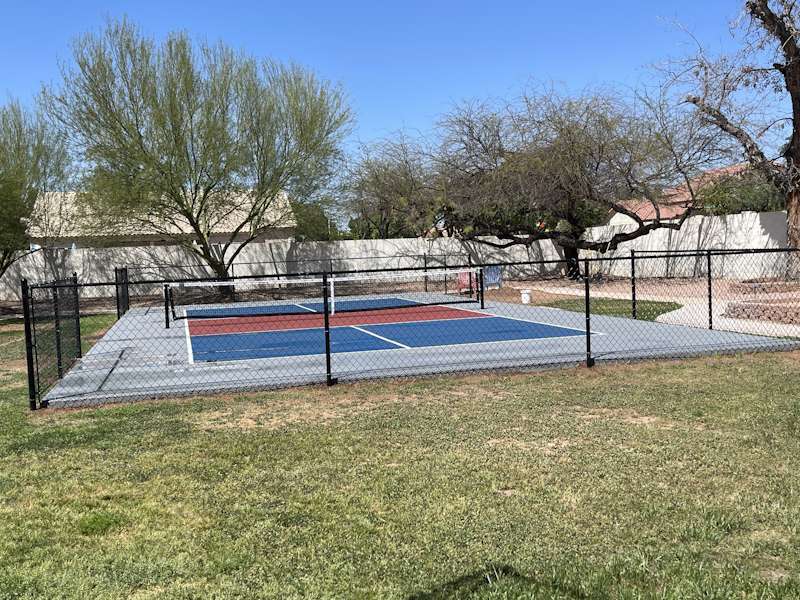
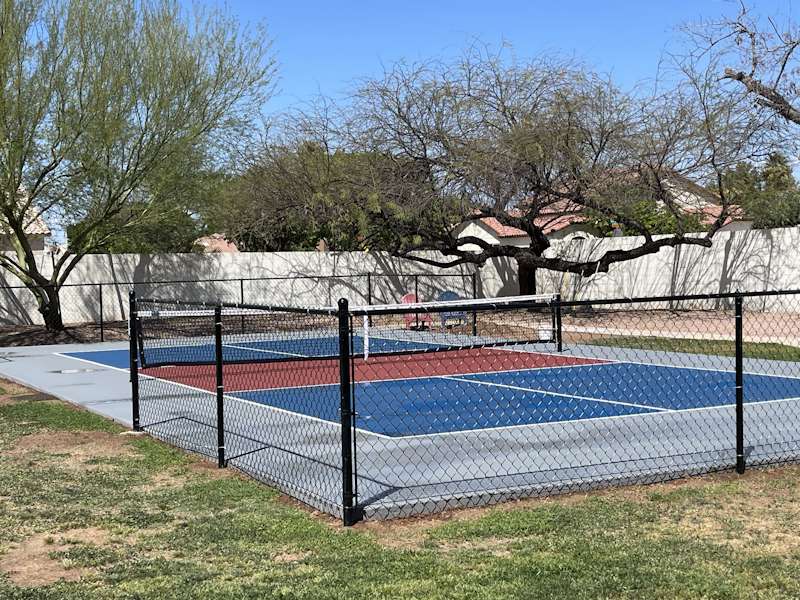
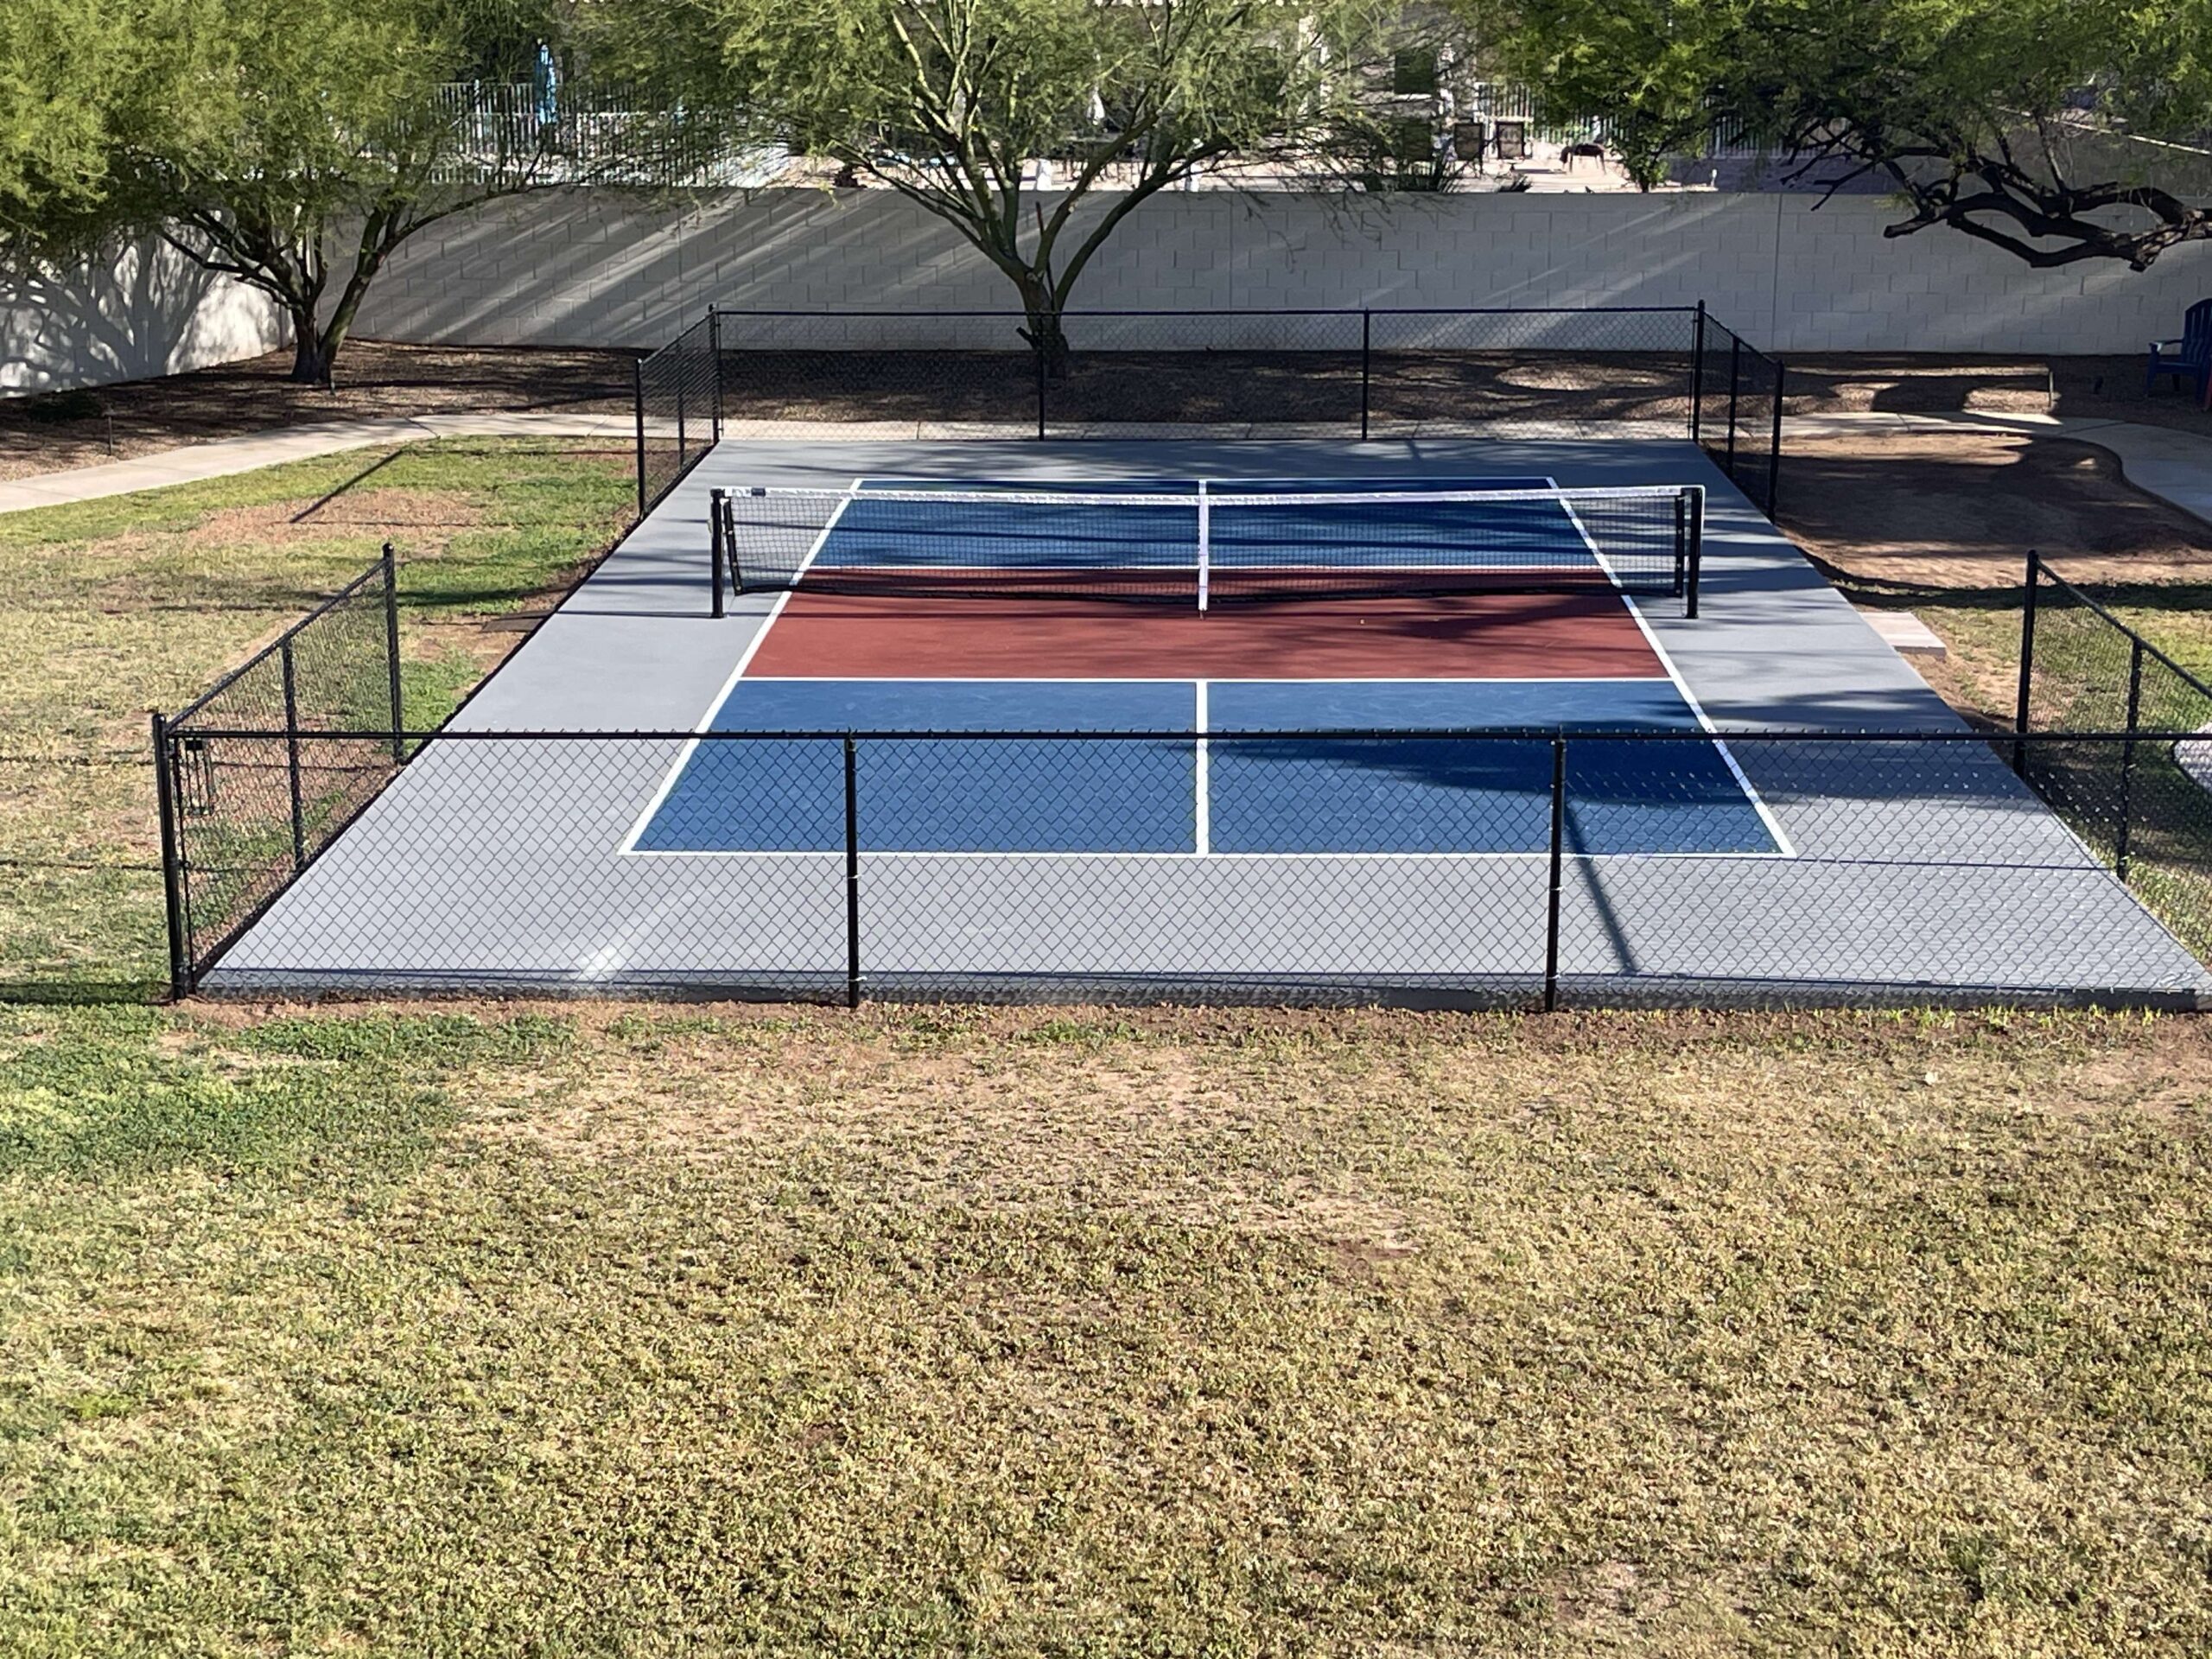
When planning the court boundaries, fencing was a top priority—not because we wanted to close the space off from the rest of the yard, but because we absolutely dreaded chasing rogue balls into the bushes after every missed shot. We ultimately selected a heavy-duty, 4-foot black vinyl-coated chain-link fence to wrap around the court perimeter. It provides the perfect physical barrier to trap low baseline misses and wild dinks, while keeping the entire backyard feeling bright, airy, and visually connected to our home.
The absolute best part about choosing a 4-foot height? It made the entire installation process completely hassle-free. Because most local municipal residential zoning laws freely permit fences under 6 feet tall without special authorization, we didn’t have to deal with tedious HOA approval boards, file for costly city variances, or have any complicated boundary conversations with our neighbors. It blended seamlessly into our new landscaping, stayed completely within local guidelines, and went up in just a single weekend—giving us immediate ball containment without any of the administrative headaches or a closed-in cage feeling.
The Finishing Touch: Framing the Oasis
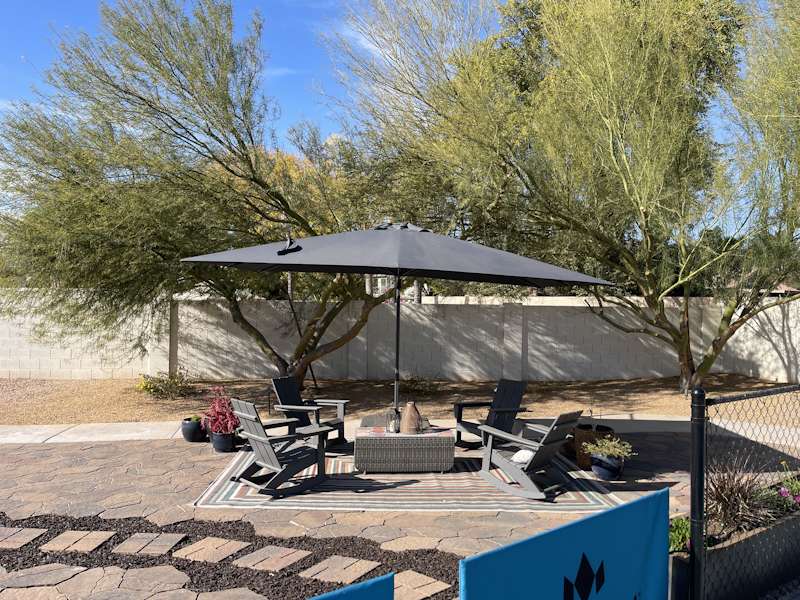
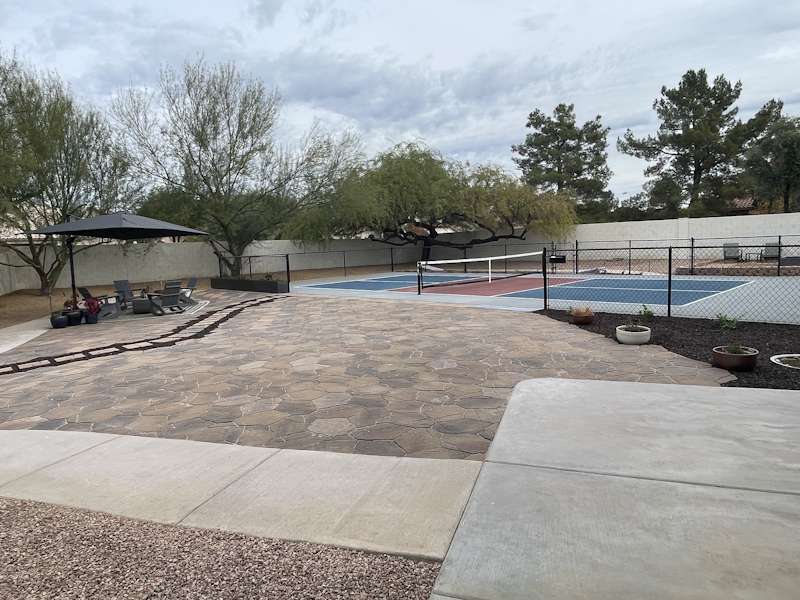

Once the heavy concrete trucks and fencing crews cleared out, we knew we needed to soften up the space and make it feel like a true resort-style oasis. We spent the final weekend surrounded by rubber mulch, 100s of irregular concrete patio stones, and green thumbs to frame the perimeter.
We planted a wall of sleek, fast-growing privacy hedges along the back fence to act as a natural windbreak and visual backdrop for tracking the ball. Around the sidelines, we laid down a clean border of dark brown rubber mulch and added low-profile ornamental plants that won’t dropping messy leaves onto our pristine acrylic surface. Now, it looks just as incredible from the back porch as it feels to play on.
Court Rules (According to Us)
To keep the vibes immaculate, we have established a few ground rules for anyone stepping onto the court:
- Hydration is Mandatory: The court-side cooler stays stocked, and breaks are required between grueling games.
- Paddle Taps Only: Respect the gear, respect your partner, and always tap paddles at the kitchen line after a hard-fought game.
- The “Fence Favor”: If you smash a ball completely over the 4-foot fence into the rest of the yard, you are automatically on ball pickup duty before the next game.
What’s Next? The Ultimate Community Hub
This court wasn’t built for the masses; it was built to bring our closest friends and family together for unforgettable weekends, intense family rivalries, and post-match backyard barbecues. It is our new favorite spot to disconnect from screens and connect over some healthy competition right outside our back door.
Moving forward, this page is transforming into our home base for all things pickleball. We will be linking out to other exclusive guides right here on our site, including:
Strategic Play: How to dominate the kitchen line using patience and placement over raw power.
The Mental Edge: Master the psychology of staying calm during intense hand battles and high-stakes games.
Backyard Inspo: Real-world examples and design ideas from other incredible private home courts across the country, court venues to play on, and ideas for your own backyard pickleball court build.
Gear and Paddle Reviews: Our honest breakdowns of the best backyard-tested equipment, paddles, and balls to use on a home court setup.